Velvet Spike Stitch Mini Wreath Free Crochet Pattern
Introduction
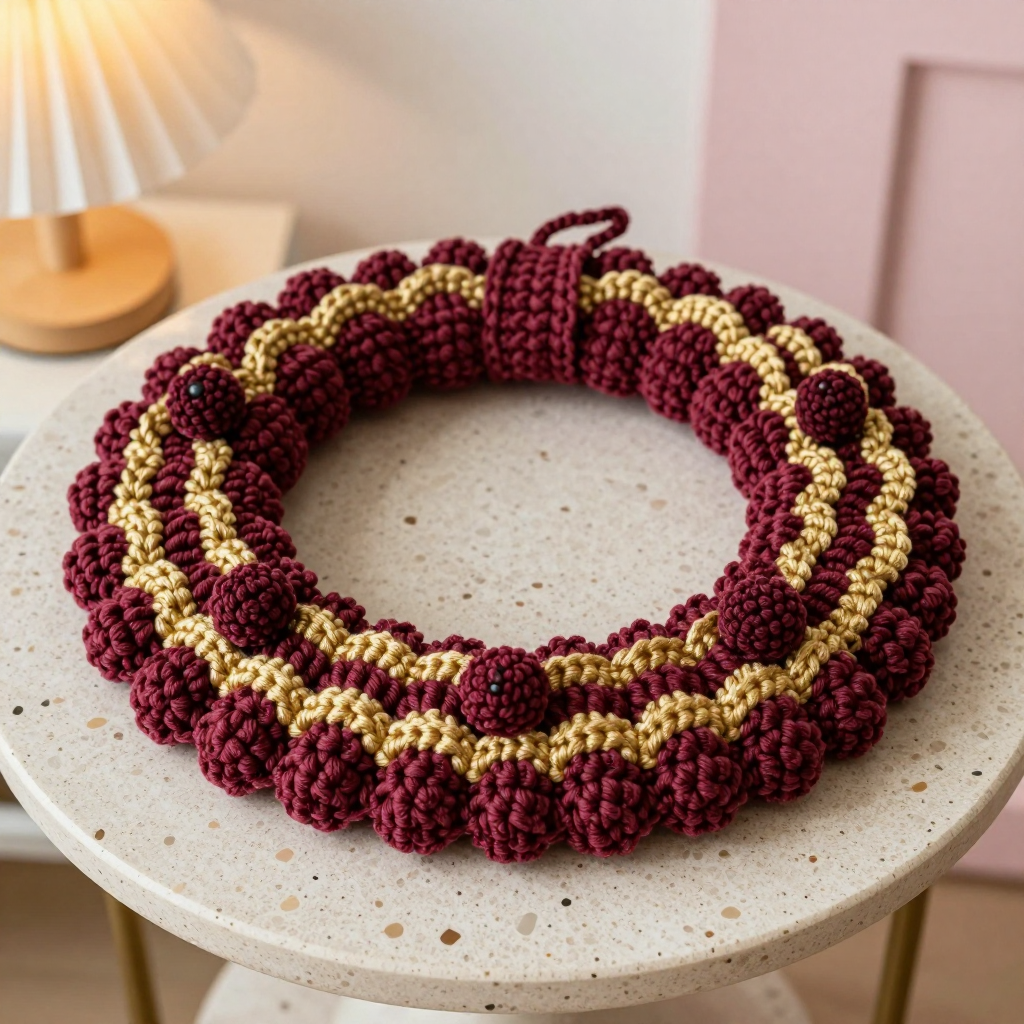
This Velvet Spike Stitch Mini Wreath is a sweet little project for anyone who wants a quick, satisfying make with a big payoff in texture. It's beginner-friendly: if you can single crochet and join rounds, you can make this wreath. The spike stitches are worked into stitches two rows below, so the raised loops create soft wavy stripes that alternate between deep burgundy and warm gold. Worked in worsted-weight velvet yarn, the finished wreath is plush, slightly fuzzy, and wonderfully touchable, and at about 5 inches across it's perfect for a door handle, a small wall hook, or a gift topper. Three tiny stuffed berries finish it off with a whimsical touch.
Materials Needed
- Yarn: Worsted weight velvet yarn (100% polyester, approx. 100 yds per 100g skein):
- Color A (burgundy): 40 yds
- Color B (gold): 30 yds
- Color C (burgundy, for berries): 5 yds
- Hook: 5.0 mm (H-8) crochet hook
- Notions: Stitch marker, tapestry needle, small amount of polyester fiberfill for the berries, scissors
- Finished size: Approx. 5 inches (12.7 cm) in diameter
Abbreviations
- ch — chain
- sl st — slip stitch
- sc — single crochet
- inc — increase (work 2 sc in the same stitch)
- dec — decrease (work 2 stitches together into 1)
- spike st — spike stitch (insert hook into the corresponding stitch 2 rows below, yarn over, pull up a loop, yarn over, pull through both loops on hook)
- MR — magic ring
- st(s) — stitch(es)
Gauge
14 sts and 16 rows = 4 inches (10 cm) in spike stitch pattern. To check, crochet a small swatch in pattern and measure a 4-inch section; adjust your hook size if needed to match.
Tips Before You Start
- Velvet yarn can be slippery and sheds a little, so keep your tension relaxed and avoid pulling tight, or the fuzz will flatten.
- When you join the chain into a ring, double-check it isn't twisted before working Round 1 — a twist is hard to fix later.
- Spike stitches are easiest when you gently stretch the fabric to see the stitch two rows below; work into the stitch directly beneath the current one.
- Use a stitch marker at the start of each round so you always know where to join.
Step-by-Step Instructions
Wreath Base
With A, ch 60, join with sl st to form a ring, being careful not to twist.
R1: ch 1, sc in each ch around, join with sl st to first sc (60 sts).
R2: ch 1, sc in each st around, join (60 sts).
R3: ch 1, [sc in next st, spike st in next st] around, join (60 sts).
R4: ch 1, sc in each st around, join (60 sts).
Change to B.
R5: ch 1, [spike st in next st, sc in next st] around, join (60 sts).
R6: ch 1, sc in each st around, join (60 sts).
R7: ch 1, [sc in next st, spike st in next st] around, join (60 sts).
R8: ch 1, sc in each st around, join (60 sts).
Change to A.
R9: ch 1, [spike st in next st, sc in next st] around, join (60 sts).
R10: ch 1, sc in each st around, join (60 sts).
R11: ch 1, [sc in next st, spike st in next st] around, join (60 sts).
R12: ch 1, sc in each st around, join (60 sts).
Fasten off. Weave in ends.
Berries (make 3)
With C, MR 6 sc.
R2: inc in each st around (12 sts).
R3: sc in each st around (12 sts).
R4: dec in each st around (6 sts).
Stuff lightly. Close opening. Fasten off, leaving a long tail for sewing.
Assembly and Finishing
Sew the three berries evenly spaced around the front of the wreath, using the photo as a guide. Weave in all remaining ends. Attach a small loop of yarn at the top for hanging, if desired. Gently steam or lightly block the wreath flat, being careful not to crush the velvet pile.
Pro Tips and Variations
- Swap the gold for cream or ivory for a softer, more neutral look.
- Add a fourth berry or a tiny crocheted leaf for extra detail.
- Make a larger wreath by chaining a longer ring in a multiple of 2 and adding more rounds in the same color sequence.