Terracotta Crochet Planter Pot with Lid Free Pattern
Terracotta Crochet Planter Pot with Lid – Free Pattern
Introduction
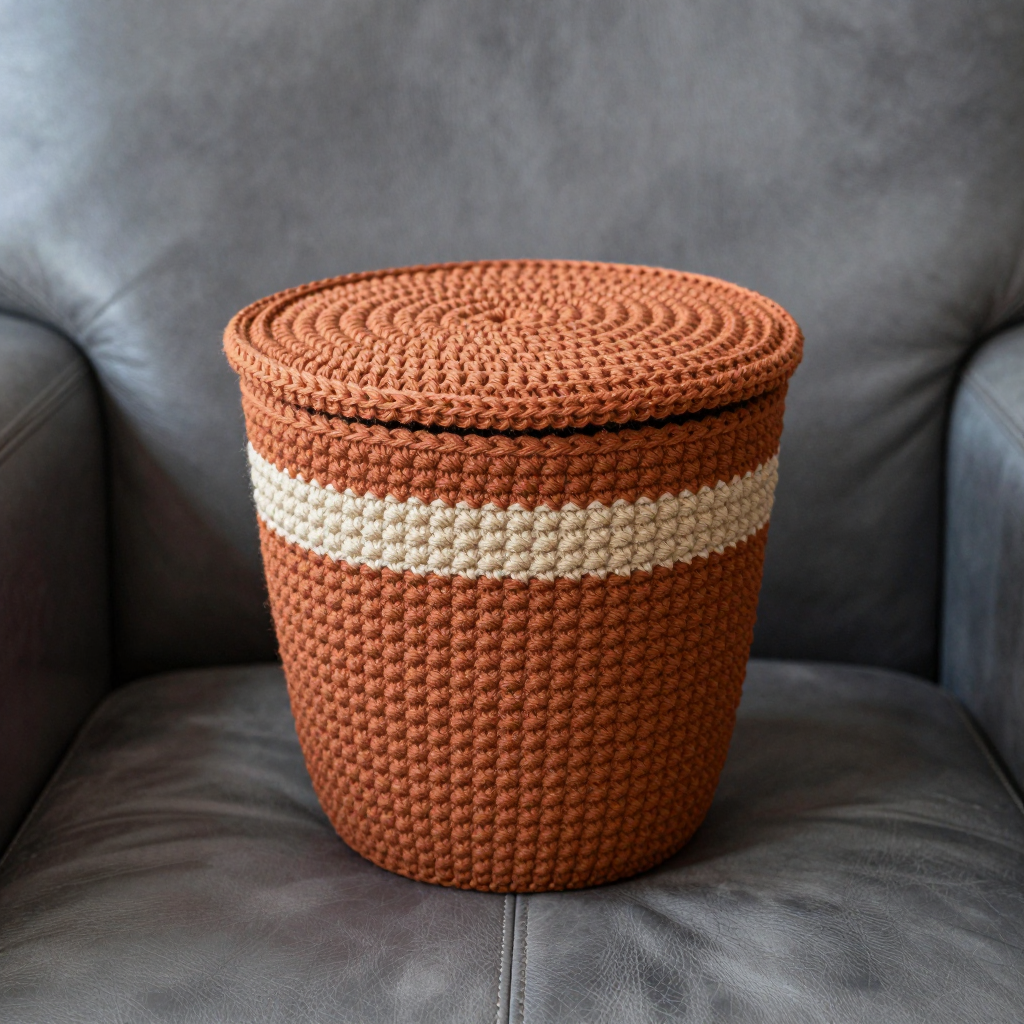
This terracotta crochet planter pot is a warm, modern little vessel that looks lovely on a shelf, desk, or windowsill. It's designed for crocheters who are comfortable with single crochet and simple increases and decreases, and it's a wonderfully calming project for anyone who loves clean, contemporary home decor. The straight-sided pot is worked in solid terracotta with a crisp two-round sand band just below the rim, and the flat disc lid sits neatly on a short inner lip so it stays put. Worked in smooth worsted acrylic, the finished set feels sturdy but soft, with a tidy single-crochet texture that lets the color blocking do all the talking.
Materials Needed
- Yarn: Worsted weight (4) acrylic yarn — approx 150 yds terracotta and 30 yds sand
- Hooks: 5 mm (H-8) hook for the pot and lid; 4.5 mm (7) hook for the lip
- Notions: Stitch marker, tapestry needle, scissors, measuring tape
- Finished size: Pot approx 6 inches diameter x 4.5 inches tall; lid approx 5.5 inches diameter
Abbreviations
- MR – magic ring: an adjustable loop you crochet into to start a round with no hole
- sc – single crochet
- inc – increase: work 2 single crochet into the same stitch
- dec – decrease: work 2 single crochet together into one stitch
- ch – chain
- rnd(s) – round(s): a complete circle of stitches
- sts – stitches
- [ ] x6 – repeat the instructions inside the brackets six times
Gauge
16 sts and 16 rnds = 4 inches in single crochet with the 5 mm hook. To check, crochet a small flat swatch in sc and measure a 4-inch section; adjust your hook size if you have more or fewer stitches than 16.
Tips Before You Start
- Work the base in a continuous spiral and place a stitch marker in the first stitch of each round so you never lose your place.
- Keep your tension even and slightly firm — a dense fabric helps the pot hold its straight-sided shape.
- Change colors on the last stitch of the round before the new color begins, so the sand band starts cleanly.
- Don't fasten off the pot until you've checked the height against the lid; the lip is sized to fit the 60-stitch rim.
Step-by-Step Instructions
Pot (terracotta, 5 mm hook)
Rnd 1: MR, 6 sc (6 sts)
Rnd 2: inc x6 (12 sts)
Rnd 3: [sc, inc] x6 (18 sts)
Rnd 4: [2 sc, inc] x6 (24 sts)
Rnd 5: [3 sc, inc] x6 (30 sts)
Rnd 6: [4 sc, inc] x6 (36 sts)
Rnd 7: [5 sc, inc] x6 (42 sts)
Rnd 8: [6 sc, inc] x6 (48 sts)
Rnd 9: [7 sc, inc] x6 (54 sts)
Rnd 10: [8 sc, inc] x6 (60 sts)
Rnds 11–12: sc in each st around (60 sts)
Change to sand.
Rnds 13–14: sc in each st around (60 sts)
Change to terracotta.
Rnds 15–28: sc in each st around (60 sts)
Fasten off.
Lid (terracotta, 5 mm hook)
Rnd 1: MR, 6 sc (6 sts)
Rnd 2: inc x6 (12 sts)
Rnd 3: [sc, inc] x6 (18 sts)
Rnd 4: [2 sc, inc] x6 (24 sts)
Rnd 5: [3 sc, inc] x6 (30 sts)
Rnd 6: [4 sc, inc] x6 (36 sts)
Rnd 7: [5 sc, inc] x6 (42 sts)
Rnd 8: [6 sc, inc] x6 (48 sts)
Rnd 9: [7 sc, inc] x6 (54 sts)
Rnd 10: [8 sc, inc] x6 (60 sts)
Rnd 11: sc in each st around (60 sts)
Rnd 12: [8 sc, dec] x6 (54 sts)
Rnd 13: sc in each st around (54 sts)
Fasten off.
Lip (terracotta, 4.5 mm hook)
Rnd 1: Ch 54, join with a slip stitch to form a ring, then sc in each ch around (54 sts)
Rnds 2–3: sc in each st around (54 sts)
Fasten off.
Assembly and Finishing
Turn the lid so the wrong side faces you. Pin the lip around the inside of the lid at round 12 (the decrease round), aligning the lip's top edge with that round, and sew it in place with a tapestry needle and matching terracotta yarn, working through both layers. Remove the pins and check that the lip sits flat and the lid drops neatly onto the pot rim. Weave in all ends on the wrong side, splitting the yarn through a few stitches to secure it. Block lightly by misting with water and shaping the pot and lid flat with your hands; let them dry fully before placing the lid on the pot.
Pro Tips and Variations
- Swap the sand band for a soft cream or charcoal stripe for a different modern palette.
- Add a second narrow stripe two rounds below the first for a subtle layered look.
- Use a cotton or cotton-blend yarn for a crisper, more structured pot that holds its shape even better.