Tumbling Blocks Pot Cover: Free Crochet Pattern
Introduction
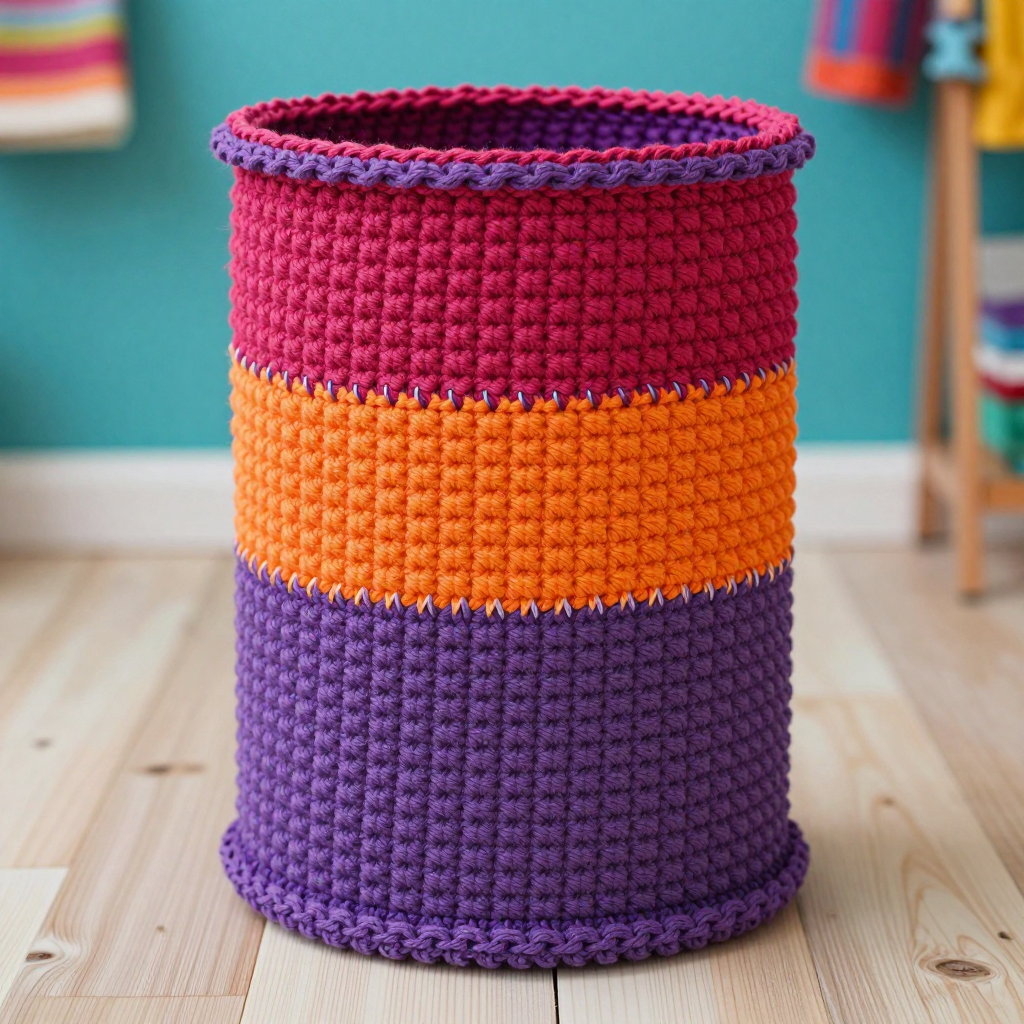
This Tumbling Blocks Pot Cover is a cheerful, graphic way to dress up a plain plant pot. It's made from three simple single crochet strips in bold fuchsia, orange, and purple, then seamed together into a straight tube that slips right over a standard 4-inch pot. The offset color blocks create a striking diamond effect that looks far more complicated than it actually is. The fabric is dense and sturdy, so it holds its shape nicely around the pot, and the single crochet rims at the top and bottom give it a tidy, finished look. If you can single crochet in rows and whipstitch a seam, you can make this cover.
Materials Needed
- Yarn: Worsted weight (category 4) acrylic or cotton yarn — 80 yd fuchsia (A), 80 yd orange (B), 80 yd purple (C). Sample uses Red Heart Super Saver in Shocking Pink (A), Pumpkin (B), and Dark Orchid (C).
- Hook: 6 mm (J/10) crochet hook
- Notions: Tapestry needle for seaming and weaving in ends, scissors, stitch markers (optional), tape measure
- Finished size: Approximately 6.5 inches (16.5 cm) tall and 12 inches (30.5 cm) circumference, to fit a pot up to 4 inches (10 cm) in diameter
Abbreviations
- ch — chain: make a loop of yarn and pull it through the loop on your hook.
- sc — single crochet: insert hook into stitch, yarn over, pull up a loop, yarn over, pull through both loops.
- st(s) — stitch(es): the loops on your work that you crochet into.
- R — row or round: one complete pass across the work.
- tog — together (used in the phrase "join … tog" for seaming).
Gauge
14 sts and 16 rows = 4 inches (10 cm) in single crochet. To check, crochet a small swatch in single crochet and measure a 4-inch section; adjust your hook size if you have more or fewer stitches than 14 per 4 inches.
Tips Before You Start
- Keep your single crochet tension even across all three strips so the seams lie flat and the tube stays straight.
- Leave a generous tail on Strip 2 (B) — you'll use it to whipstitch the long edges, and a longer tail makes seaming much easier.
- Before joining the short ends into a tube, lay the strips flat and check that no strip is twisted; a twist here is hard to fix later.
- Count your stitches at the end of every strip row — each strip must stay at 20 stitches so the joined tube totals 60 stitches around.
Step-by-Step Instructions
Strip 1 (Color A — Fuchsia)
Set-up: Ch 21.
R1: Sc in 2nd ch from hook and each ch across (20 sts).
R2–6: Ch 1, turn, sc in each st across (20 sts).
Fasten off.
Strip 2 (Color B — Orange)
Work exactly as for Strip 1: ch 21, then R1–6 as written (20 sts per row). Do not fasten off; leave a long tail for seaming.
Strip 3 (Color C — Purple)
Work exactly as for Strip 1: ch 21, then R1–6 as written (20 sts per row). Fasten off.
Join the Strips
With right sides facing, using the long B tail, whipstitch Strip 1 to Strip 2 along one long edge. Join Strip 3 to the other long edge of Strip 2. Join the short ends of Strip 1 and Strip 3 to form a tube, being careful not to twist (60 sts around).
Top Edging (Color A — Fuchsia)
Join A at the top edge.
R1: Ch 1, sc evenly around top edge (60 sts).
R2: Ch 1, sc in each st around (60 sts).
Fasten off.
Bottom Edging (Color C — Purple)
Join C at the bottom edge.
R1: Ch 1, sc evenly around bottom edge (60 sts).
R2: Ch 1, sc in each st around (60 sts).
Fasten off.
Assembly and Finishing
Weave in all ends on the wrong side of the work, taking care not to pull the fabric tight. Gently block the cover lightly to measurements: mist with water, shape into a straight tube 6.5 inches tall and 12 inches around, and let it dry flat. Slip the finished cover over your pot and adjust the top and bottom rims so they sit evenly.
Pro Tips and Variations
- Swap the color order (purple, orange, fuchsia) for a different look, or use a self-striping yarn for a softer gradient effect.
- For a snugger fit on a smaller pot, reduce each strip to 18 stitches wide and adjust the edging rounds to 54 stitches around.
- Add a third edging round in a contrasting color for a bolder rim, or work the edging in half double crochet for a slightly thicker, more textured border.