Gingerbread Grid Crochet Hanging Basket Free Pattern
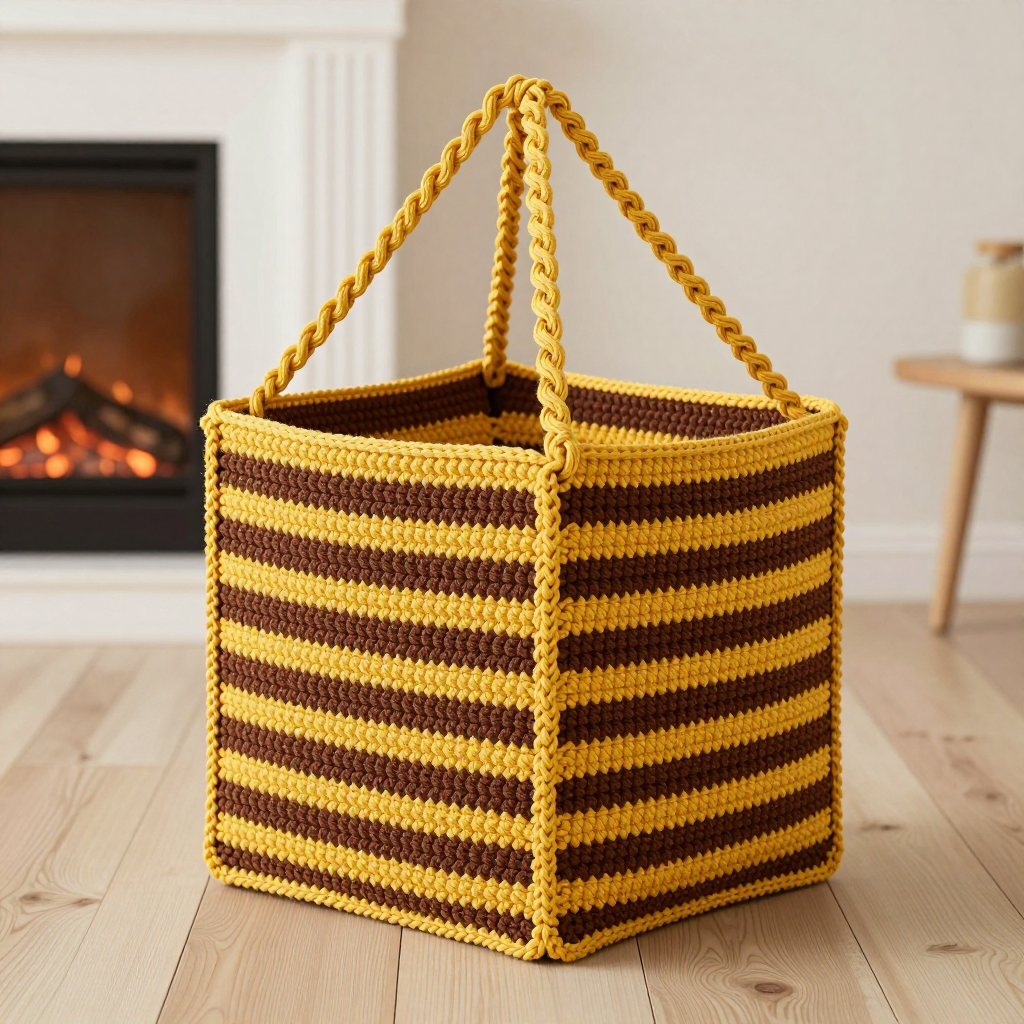
Gingerbread Grid Crochet Hanging Basket Free Pattern
Introduction
This cozy little hanging basket is the perfect early-Christmas project for anyone who loves cottagecore charm and quick, satisfying makes. Three square corner-to-corner (C2C) panels come together into a three-sided open-top basket, striped in warm molasses brown and golden saffron. It's a wonderful beginner-friendly introduction to C2C crochet, and it works up fast in bulky wool. Fill it with a small potted plant, pinecones, or little gifts, and it looks just as lovely hanging by a window or on a hook by the door.
Materials Needed
- Yarn: Bulky weight wool (approx. 100 g / 120 yd per skein). Color A (Molasses): 1 skein (120 yd). Color B (Saffron): 1 skein (120 yd).
- Hook: 6.0 mm (J-10) crochet hook.
- Notions: Tapestry needle, scissors, stitch markers (optional), and a ruler or tape measure for checking gauge.
- Finished size: Approx. 8 inches (20 cm) wide x 8 inches (20 cm) tall x 4 inches (10 cm) deep.
Abbreviations
- ch — chain: make a loop of yarn and pull it through the loop on your hook.
- dc — double crochet: yarn over, insert hook in stitch, pull up a loop, yarn over and pull through two loops, yarn over and pull through the last two loops.
- dc3 — a group of 3 double crochet worked into the same space.
- sc — single crochet: insert hook in stitch, pull up a loop, yarn over and pull through both loops.
- sl st — slip stitch: insert hook in stitch, yarn over and pull through both the stitch and the loop on your hook.
- sp — space (usually a ch-3 space).
- st(s) — stitch(es).
- C2C — corner-to-corner: a technique worked diagonally in blocks of 3 dc + ch 3.
Gauge
1 C2C block = 1 inch (2.5 cm) square, where one block is 3 dc + ch 3. To check, work a few blocks and measure a single block across; adjust your hook size if needed so each block measures about 1 inch.
Tips Before You Start
- Count your blocks, not your stitches. In C2C, each ch-3 space is one block. Counting spaces keeps your rows even and your square square.
- Keep your turning chains consistent. Every row starts with ch 3 and turns; this chain acts as the first block's space, so don't skip it.
- Change color on the last stitch of the row. Finish the final dc of the row with the new color so the stripe edge stays clean.
- Make all three panels the same size. Lay them flat side by side before edging; matching panels make assembly much easier.
Step-by-Step Instructions
Panel (make 3 — one for base/back, two for sides)
Worked in corner-to-corner blocks. Each block = 3 dc + ch 3.
Row 1: With A, ch 6. Dc in 4th ch from hook, dc in next 2 ch, ch 3, turn. (1 block)
Row 2: [Dc3, ch 3, dc3] in ch-3 sp, ch 3, turn. (2 blocks)
Row 3: [Dc3, ch 3] in first ch-3 sp, [dc3, ch 3, dc3] in next ch-3 sp, ch 3, turn. (3 blocks)
Row 4: [Dc3, ch 3] in each ch-3 sp across, dc3 in last ch-3 sp, ch 3, turn. (4 blocks)
Rows 5–8: Repeat Row 4, increasing 1 block each row until you have 8 blocks. (8 blocks)
Change to Color B.
Rows 9–16: Work even in C2C (8 blocks per row), changing color every 2 rows, alternating A and B. Fasten off. (8 blocks per row)
Edging (each panel)
Edging: With A, sc evenly around the entire panel, working 1 sc in each dc and 1 sc in each ch-3 sp, with 3 sc in each corner. Fasten off.
Assembly
Joining: Arrange the panels with the base/back flat and the two side panels perpendicular, aligning the bottom edges. With A, join the side panels to the base/back using sc through both layers along the bottom and side edges, leaving the top open. Join the two side panels together at the front corners with sc.
Hanging Loops (make 2)
Chain ring: With B, ch 30, join with sl st to form a ring.
Braid: Cut 3 strands of B, each 40 inches long. Fold in half, pull the loop through the ch ring, braid to desired length, and secure the end. Attach one loop to each top corner of the back panel.
Assembly and Finishing
Weave in all ends with your tapestry needle, working them into the back of the stitches so they don't show. Gently steam or wet-block each panel before joining so the squares lie flat and measure evenly. After assembly, block the finished basket lightly to shape the corners, then hang it to dry fully before use.
Pro Tips and Variations
- Swap the stripes: Work the whole basket in one color, or use a third shade for a wider stripe band.
- Add a liner: Slip a small glass or plastic cup inside to hold a real plant without dampening the wool.
- Make it a gift set: Whip up a second basket in reverse colors (saffron base, molasses stripes) for a matching pair.