Dancer's Crochet Slipper Socks Free Pattern
Introduction
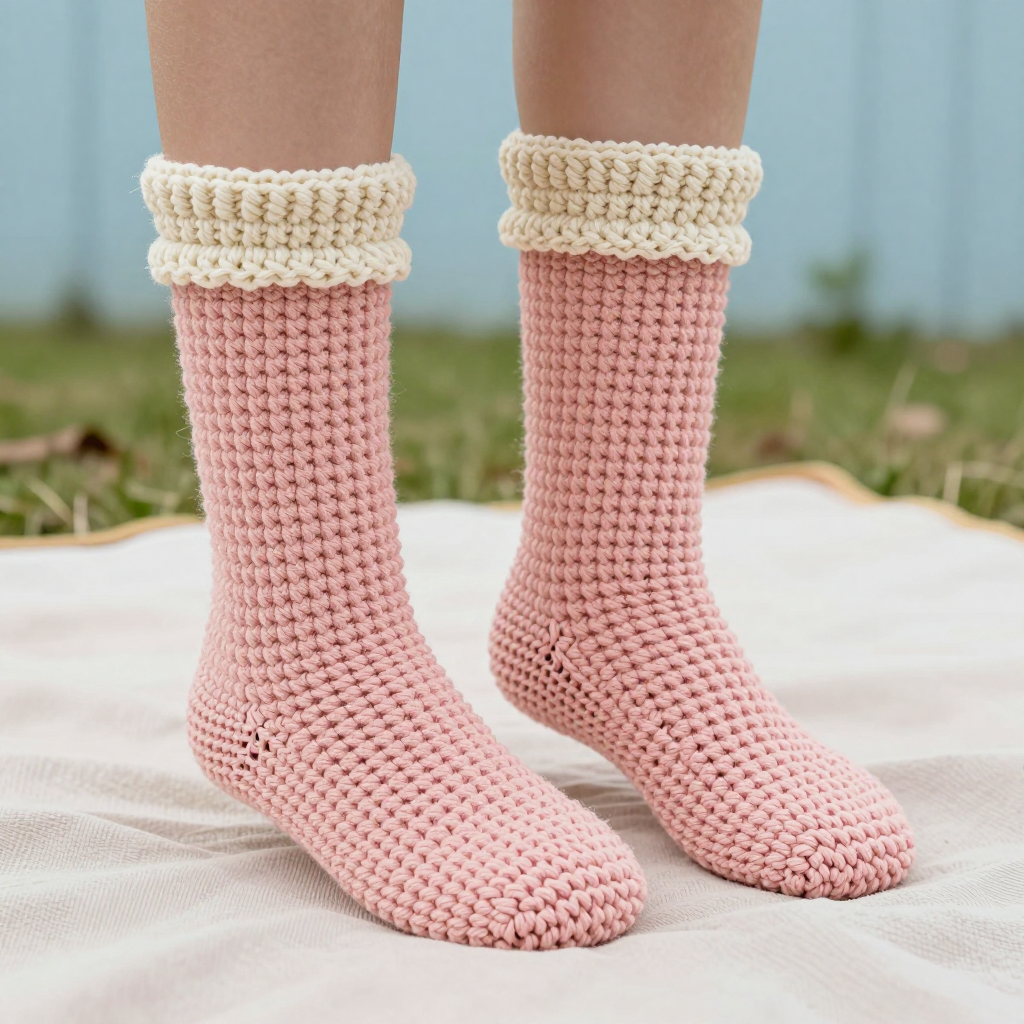
These Dancer's Crochet Slipper Socks are made for anyone who wants a soft, ballet-inspired layer to wear around the studio or the house. The design is a simple seamless tube worked from a closed toe up to the ankle, so there is no fussy shaping to slow you down. The body is a gentle soft rose, finished with a cream cuff that folds over for a double-thick, cozy edge. Slip them on and they feel smooth and snug, like a warm hug for tired feet.
Materials Needed
- Yarn: Worsted weight (4) yarn, about 150 yards (137 m) total: 100 yards (91 m) soft rose (A) and 50 yards (46 m) cream (B). The sample uses an acrylic/wool blend.
- Hook: 4.5 mm (US 7) crochet hook.
- Notions: Stitch marker, tapestry needle, scissors, tape measure.
- Finished size: To fit women's shoe size 6-8 (foot length about 9 inches/23 cm, circumference 8 inches/20 cm). Adjustments for other sizes are included.
Abbreviations
- ch — chain: make a loop of yarn and pull it through the loop on your hook.
- sc — single crochet: insert hook, pull up a loop, yarn over, pull through both loops.
- sc2tog — single crochet two together: a decrease that joins two stitches into one.
- sl st — slip stitch: insert hook, yarn over, pull through all loops at once.
- st(s) — stitch(es).
- rnd — round: one complete circle of work.
- RS / WS — right side / wrong side (the outside and inside of the fabric).
- inc — increase: work two stitches into the same stitch.
Gauge
16 stitches and 16 rounds = 4 inches (10 cm) in single crochet worked in the round. To check it, crochet a small swatch in the round and measure a 4-inch section; if you have more stitches, go up a hook size, and if you have fewer, go down.
Tips Before You Start
- Work the body in a continuous spiral or joined rounds as written, but keep your tension even so the tube stays smooth and the two socks match.
- Try the sock on as you go: stop the straight tube when it is about 3 inches shorter than your foot length, since the heel shaping adds the rest.
- Use a stitch marker at the start of each round so you never lose your place in the long gusset section.
- Keep your toe seam neat and flat, because it sits right at the tip of the foot where lumps would be felt.
Step-by-Step Instructions
Slipper Sock (make 2)
With A, ch 25 (28, 31) for sizes S (M, L).
Rnd 1: Sc in 2nd ch from hook and each ch across, do not turn; sc in each ch along opposite side of foundation ch (48, 54, 60 sts). Join with sl st to first sc.
Rnd 2: Ch 1, sc in each st around (48, 54, 60). Join.
Rnds 3-24: Repeat Rnd 2 until piece measures 6 (6.5, 7) inches from foundation, or 3 inches less than desired foot length.
Shape Heel
Row 1: Ch 1, sc in next 24 (27, 30) sts, turn.
Row 2: Ch 1, sc in each st across (24, 27, 30). Turn.
Rows 3-8: Repeat Row 2 until heel flap measures 2 (2.25, 2.5) inches, ending with a WS row.
Turn Heel
Row 1 (RS): Ch 1, sc in 14 (16, 18) sts, sc2tog, sc in next st, turn.
Row 2: Ch 1, sc in 7 (8, 9) sts, sc2tog, sc in next st, turn.
Row 3: Ch 1, sc in 8 (9, 10) sts, sc2tog, sc in next st, turn.
Continue in this manner, working 1 more st before the decrease each row, until all heel sts are worked (16, 18, 20 sts rem). Fasten off.
Gusset
Join A to right side of heel flap.
Rnd 1: Ch 1, sc evenly along side of heel flap (approx 12, 14, 16 sts), sc in each unworked st of instep (24, 27, 30 sts), sc evenly along other side of heel flap (12, 14, 16 sts), sc in heel sts (16, 18, 20 sts). Join with sl st to first sc (64, 73, 82 sts).
Rnd 2: Ch 1, sc in each st around, dec 1 st at each side of instep (sc2tog over last gusset st and first instep st, and over last instep st and first gusset st) (62, 71, 80 sts).
Rnds 3-33: Repeat Rnd 2, decreasing 1 st at each side of instep every round, until the gusset stitches are gone (0, 9, 18 sts rem). For sizes M and L only, continue decreasing as established until 0 sts rem at the sides of the instep, then work even on the remaining instep sts (9, 18 sts). Fasten off.
Cuff
With B, join to any st at top of sock.
Rnd 1: Ch 1, sc in each st around. Join.
Rnds 2-12: Repeat Rnd 1 (12 rounds total).
Fold cuff in half to WS and sew live sts to base of cuff.
Assembly and Finishing
Sew the toe seam closed using A, matching the two edges of the foundation chain evenly. Weave in all ends on the wrong side. Block lightly to measurements by misting with water and patting into shape, then let dry flat.
Pro Tips and Variations
- Add a non-slip sole by dabbing fabric puff paint in small dots along the bottom of each sock.
- Swap the cream cuff for a contrasting color like pale pink or gray for a different studio look.
- Make a longer version by working extra even rounds before the heel for a slouchy ankle sock.