Chunky Square Cat Nap Pad Free Crochet Pattern
Introduction
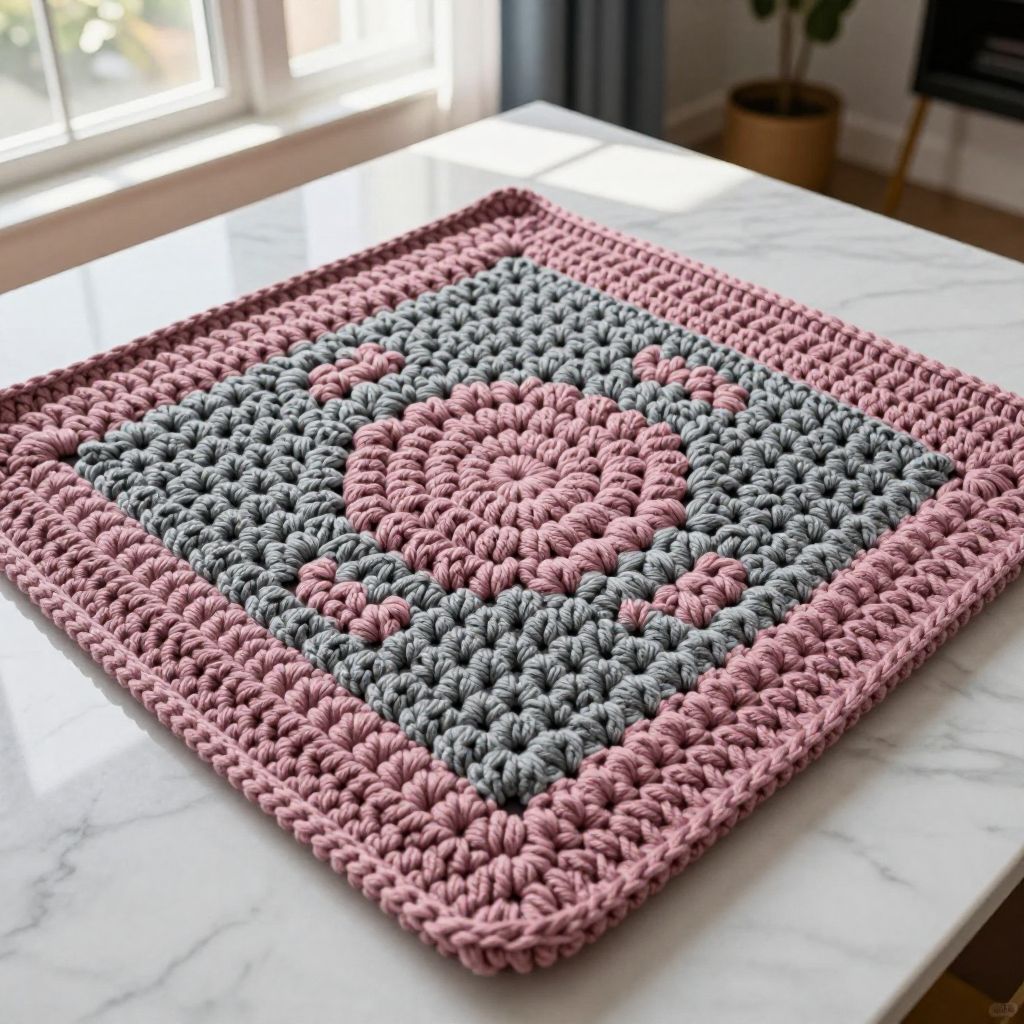
This Chunky Square Cat Nap Pad is the coziest little project for anyone who wants to make something soft and useful without a fussy pattern. It's a beginner-friendly, oversized solid granny square worked in alternating dusty rose and grey chenille, so the colors ripple outward in gentle pastel bands. The super bulky plush yarn makes it work up quickly and gives the finished mat a dense, velvety surface that cats love to knead and curl up on. At about 24 x 24 inches, it's big enough for a cat to stretch out or tuck into a tight ball, and the simple single-crochet border keeps every edge soft with no picots or scratchy details.
Materials Needed
- Yarn: Super bulky (6) chenille plush yarn, polyester — Dusty Rose (A): 220 yd; Grey (B): 220 yd
- Hook: 8.0 mm (US L-11)
- Notions: Stitch marker (for the first stitch or magic ring), tapestry needle for weaving in ends, scissors
- Finished size: Approx. 24 x 24 in (61 x 61 cm)
Abbreviations
- A / B: Color A (Dusty Rose) / Color B (Grey)
- ch: chain
- dc: double crochet
- sc: single crochet
- sp / sps: space / spaces
- MR: magic ring (an adjustable starting loop)
- sl st: slip stitch
- rep: repeat
- st / sts: stitch / stitches
Gauge
8 dc x 4 rows = 4 in (10 cm) in solid granny square rounds. To check it, work a few rounds of the pattern and measure a 4-inch section across the middle of one side; if your stitches are larger than the gauge, go down a hook size, and if smaller, go up.
Tips Before You Start
- Work in joined rounds and turn at the end of every round. Turning keeps the square from spiraling and keeps your sides straight.
- Chenille yarn can shed and fray, so keep your tension relaxed and avoid ripping out stitches more than once or twice.
- Count your stitches at the end of each round against the stitch count given — the square only stays even if every round increases by exactly 1 dc per side.
- Use a stitch marker in the top of the ch-3 or ch-5 at the start of a round so you always know where to join.
Step-by-Step Instructions
Center and Rounds 1–24 (Solid Granny Square)
Notes: Work in joined rounds, turning at the end of each round. Ch 3 at the start of a round counts as the first dc. Ch 5 at the start of a round counts as the first dc + ch 2 corner. Each round increases 1 dc per side per round.
Rnd 1 (A): MR, ch 3 (counts as dc), 2 dc, [ch 2, 3 dc] x3, ch 2, join with sl st to top of ch 3 (12 dc, 4 ch-2 sps)
Rnd 2 (B): Ch 5 (counts as dc + ch 2), 2 dc in same corner sp, *dc in each dc to next corner sp, (2 dc, ch 2, 2 dc) in corner sp; rep from * around, join (28 dc, 4 ch-2 sps)
Rnd 3 (A): Ch 5, 2 dc in corner sp, *dc in each dc to next corner sp, (2 dc, ch 2, 2 dc) in corner sp; rep from * around, join (44 dc, 4 ch-2 sps)
Rnds 4–24: Rep Rnd 3, alternating colors each round (Rnd 4 in B, Rnd 5 in A, and so on, ending Rnd 24 in B). Each round adds 16 dc. Stitch counts: Rnd 4 (60 dc), Rnd 5 (76 dc), Rnd 6 (92 dc), Rnd 7 (108 dc), Rnd 8 (124 dc), Rnd 9 (140 dc), Rnd 10 (156 dc), Rnd 11 (172 dc), Rnd 12 (188 dc), Rnd 13 (204 dc), Rnd 14 (220 dc), Rnd 15 (236 dc), Rnd 16 (252 dc), Rnd 17 (268 dc), Rnd 18 (284 dc), Rnd 19 (300 dc), Rnd 20 (316 dc), Rnd 21 (332 dc), Rnd 22 (348 dc), Rnd 23 (364 dc), Rnd 24 (380 dc); 4 ch-2 sps throughout.
Edging
Edging (A): Ch 1, sc evenly around entire outer edge, working 1 sc in each dc and 3 sc in each corner ch-2 sp, join with sl st to first sc. Fasten off.
Assembly and Finishing
There are no pieces to seam — the pad is worked as one square. Weave in all ends on the wrong side with your tapestry needle, threading each tail through a few stitches in the same color so it disappears into the plush texture. Block lightly by misting the mat and patting it flat into a 24 x 24 in square, then let it dry fully before giving it to your cat.
Pro Tips and Variations
- Swap the two colors for any two super bulky chenille shades you like — a cream and sage pair looks lovely in a pastel nursery.
- Add two or three more rounds for a larger mat, remembering each extra round adds 16 dc and about 1 inch per side.
- For a thicker, cushier pad, work the edging round twice, or slip a thin foam square underneath for extra support on hard floors.