Two-Tone Ribbed Brim Bucket Hat Free Crochet Pattern
Introduction
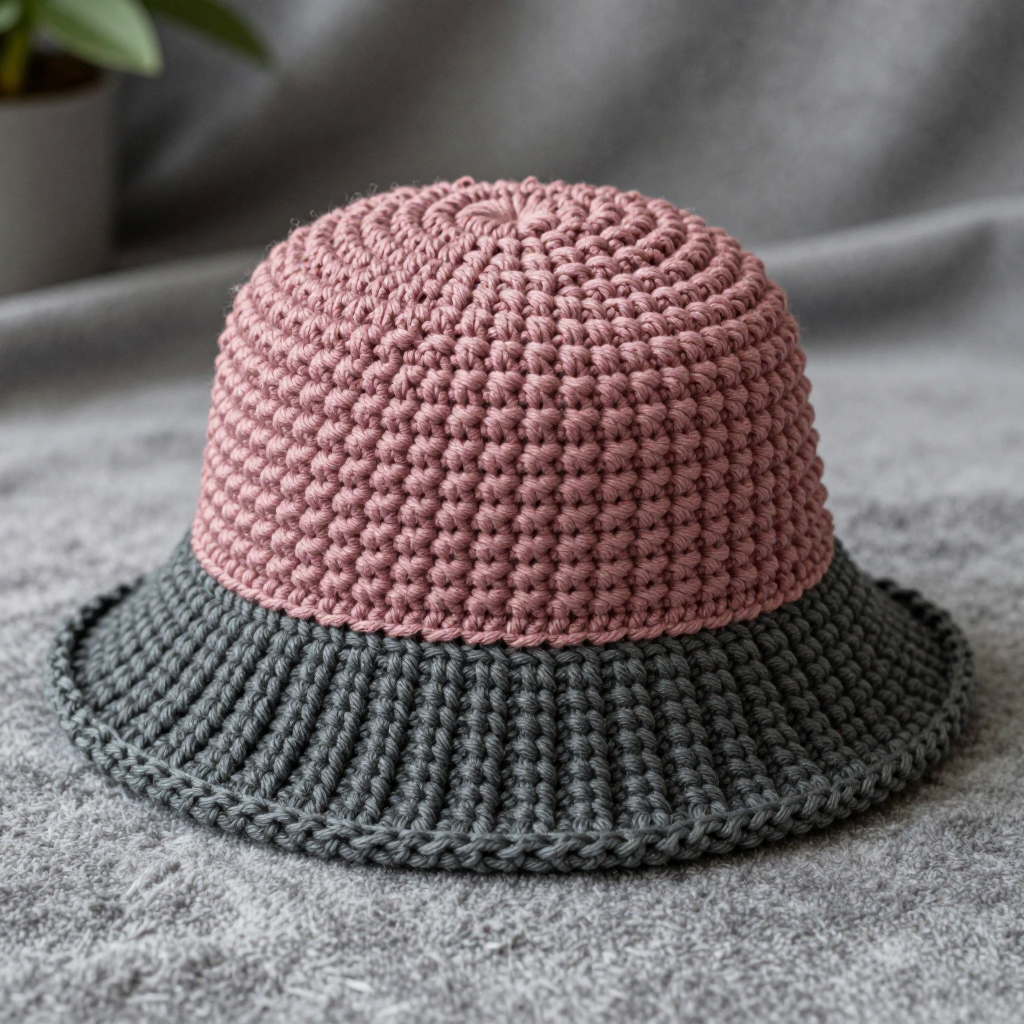
This two-tone bucket hat pairs a soft dusty rose crown with a deep grey post-ribbed brim, giving you a cozy, textured accessory that looks equally at home on a mountain cabin porch or a city street. It is written for crocheters who are comfortable with single crochet and ready to try front and back post stitches for the first time — the ribbing is simple once you see it work up. Held double, the lace-weight mohair silk makes the hat featherlight and gently fuzzy, while the ribbed band adds just enough structure to hold its shape. Wear the brim down for a relaxed slouch or fold it up for a snug, vintage-inspired fit.
Materials Needed
- Yarn: Lace weight mohair silk blend (approx. 420 m/50 g), held double throughout.
- Color A (dusty rose): 150 m total (75 m per strand)
- Color B (deep grey): 200 m total (100 m per strand)
- Hook: 4.0 mm (US G-6)
- Notions: Stitch marker, tapestry needle, scissors, tape measure
- Finished size: Fits a head circumference of 54 cm; height 19 cm (crown 9 cm, brim 10 cm)
Abbreviations
- MR — magic ring: an adjustable loop you crochet into to start working in the round.
- sc — single crochet
- inc — increase: work 2 sc into the same stitch
- dc — double crochet
- fpdc — front post double crochet: work a dc around the post of the stitch below, from the front
- bpdc — back post double crochet: work a dc around the post of the stitch below, from the back
- blo — back loop only: insert your hook under the back loop of the stitch only
- rnd(s) — round(s)
- sts — stitches
Gauge
16 sts and 16 rnds = 10 cm in single crochet (with yarn held double). Work a small swatch in the round and measure it flat; if you have more stitches than 16 in 10 cm, go up a hook size, and if you have fewer, go down.
Tips Before You Start
- Hold the two strands of yarn together as one throughout — this is what gives the hat its soft halo and light fabric.
- Place a stitch marker at the start of each round; the crown spirals continuously and it is easy to lose your place.
- The post-ribbed brim pulls in slightly as you work it, so trust the stitch counts rather than the look of the first few rounds.
- Keep your tension relaxed on the post stitches — tight post stitches make the brim stiff and hard to fold.
Step-by-Step Instructions
Crown (Color A)
Rnd 1: MR, 6 sc into the ring (6 sts).
Rnd 2: inc x6 (12 sts).
Rnd 3: [sc, inc] x6 (18 sts).
Rnd 4: [2 sc, inc] x6 (24 sts).
Rnd 5: [3 sc, inc] x6 (30 sts).
Rnd 6: [4 sc, inc] x6 (36 sts).
Rnd 7: [5 sc, inc] x6 (42 sts).
Rnd 8: [6 sc, inc] x6 (48 sts).
Rnd 9: [7 sc, inc] x6 (54 sts).
Rnd 10: [8 sc, inc] x6 (60 sts).
Rnd 11: [9 sc, inc] x6 (66 sts).
Rnd 12: [10 sc, inc] x6 (72 sts).
Rnd 13: [11 sc, inc] x6 (78 sts).
Rnd 14: [12 sc, inc] x6 (84 sts).
Rnds 15–24: sc in each st around (84 sts).
Change to Color B at the end of Rnd 24.
Brim (Color B)
Rnd 25: sc in blo of each st around (84 sts). This creates the ridge where the brim begins.
Rnd 26: [sc, inc] x42 (126 sts).
Rnds 27–34: [fpdc, bpdc] x63 (126 sts).
Fasten off.
Edging (Color B)
Rnd 35: Join B at the brim edge, sc evenly around the bottom brim edge (126 sts). Fasten off.
Assembly and Finishing
Weave in all ends on the wrong side, working each tail through a few stitches in two directions so it stays put. There is no seaming — the hat is worked in one piece in the round. Block lightly by misting the hat and shaping it over a bowl or hat form slightly larger than your head size; let it dry fully so the ribbed brim holds its flare. Fold the brim up or leave it down as you prefer.
Pro Tips and Variations
- Swap the colors for a cream crown and camel brim for a softer, neutral look.
- Work Rnds 27–34 with a smaller hook for a firmer brim that stays folded.
- Add a second edging round in Color A for a subtle contrast stripe at the rim.


