Romantic Chocolate Caramel Crochet Phone Sleeve Free Pattern
Introduction
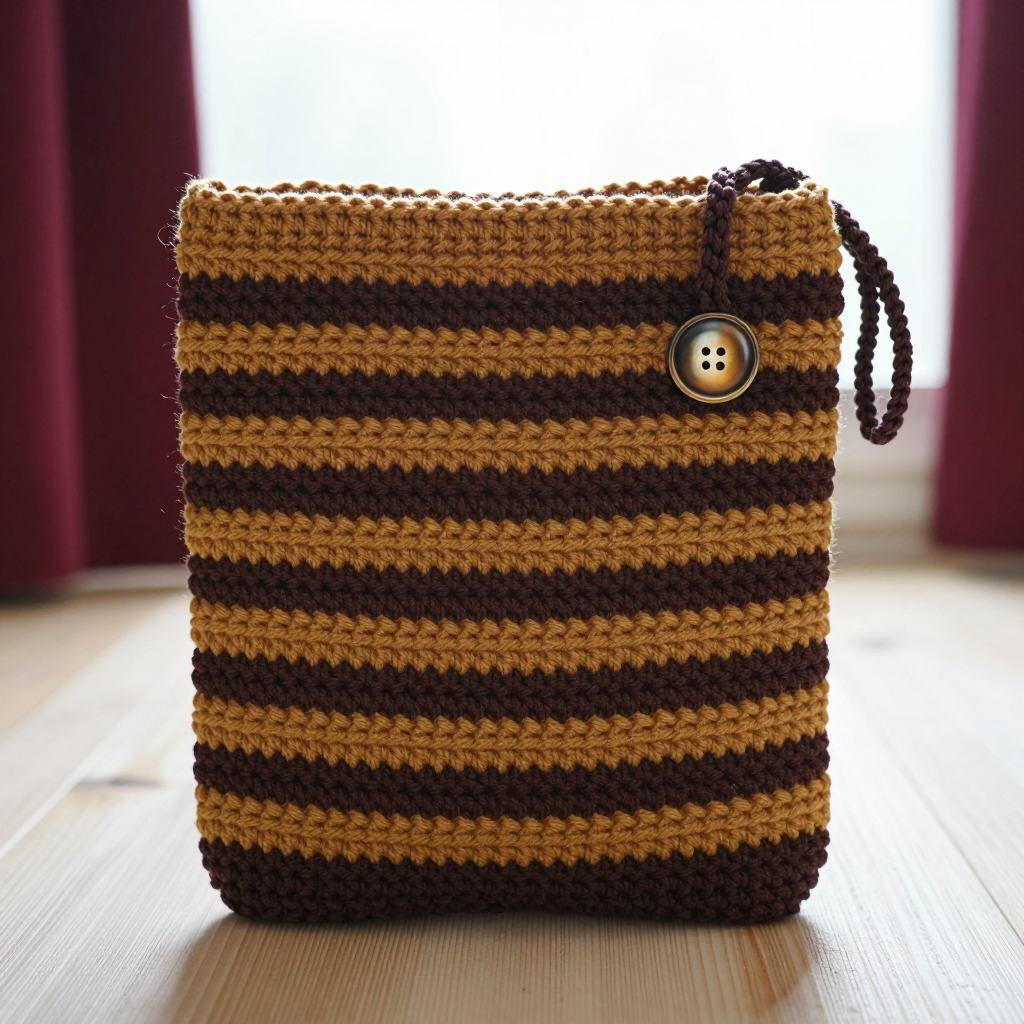
This Romantic Chocolate Caramel Crochet Phone Sleeve is a sweet little project for anyone who wants to keep their phone cozy and scratch-free in style. It is written for advanced beginners who are comfortable with single crochet and simple color changes, but every step is spelled out so newer crocheters can follow along too. The sleeve is worked as two identical striped panels in rich chocolate brown and warm caramel, then joined on three sides with a caramel single crochet seam. A delicate scalloped edging around the top opening and a vintage-style button give it that soft Victorian-inspired charm, while the smooth single crochet fabric feels sturdy yet gentle against your screen.
Materials Needed
- Yarn: Fine (2) weight yarn, approx. 100 yds total — 60 yds chocolate brown (Color A) and 40 yds caramel (Color B). The sample uses a cotton-acrylic blend.
- Hook: 3.5 mm (E/4) crochet hook
- Notions: Tapestry needle for weaving in ends, scissors, one vintage-style button (about 1/2 inch / 12 mm), sewing needle and thread for attaching the button
- Finished size: 3.5 inches (9 cm) wide x 6 inches (15 cm) tall — fits most smartphones
Abbreviations
- ch — chain: make a loop of yarn and pull it through the loop on your hook.
- fsc — foundation single crochet: a starting row of single crochet that also creates the chain edge, worked as you go.
- sc — single crochet: insert hook into stitch, yarn over, pull up a loop, yarn over, pull through both loops.
- sl st — slip stitch: insert hook into stitch, yarn over, pull through both the stitch and the loop on your hook.
- st(s) — stitch(es)
- Color A — chocolate brown; Color B — caramel
Gauge
24 sts and 28 rows = 4 inches (10 cm) in single crochet. To check, crochet a small swatch in single crochet and measure a 4-inch section in both directions; adjust your hook size if you have more or fewer stitches than 24 per 4 inches.
Tips Before You Start
- Keep your color changes neat by changing color on the last yarn-over of the final stitch of a row, so the new color begins cleanly at the start of the next row.
- Count your stitches at the end of every row — each panel must stay at 21 stitches, or the two panels won't match when joined.
- Work the two panels with the same tension; if one comes out slightly larger, use it as the back panel so the front looks crisp.
- Leave a 6-inch tail at each color change to weave in securely later, since striped fabric can loosen at the edges.
Step-by-Step Instructions
Panel (make 2)
Setup: With Color A, fsc 21 (21 sts).
Row 1: sc in each st across, turn (21 sts).
Rows 2-4: sc in each st across, turn (21 sts). Change to Color B.
Rows 5-8: sc in each st across, turn (21 sts). Change to Color A.
Rows 9-12: sc in each st across, turn (21 sts). Change to Color B.
Rows 13-16: sc in each st across, turn (21 sts). Change to Color A.
Rows 17-20: sc in each st across, turn (21 sts). Change to Color B.
Rows 21-24: sc in each st across, turn (21 sts). Change to Color A.
Rows 25-28: sc in each st across, turn (21 sts). Change to Color B.
Rows 29-32: sc in each st across, turn (21 sts). Change to Color A.
Rows 33-36: sc in each st across, turn (21 sts). Change to Color B.
Rows 37-40: sc in each st across, turn (21 sts). Change to Color A.
Rows 41-44: sc in each st across, turn (21 sts). Fasten off.
Each panel measures 21 sts wide and 44 rows tall (about 3.5 x 6 inches).
Button Loop
Row 1: With Color A, join yarn at the top right corner of the front panel with right side facing. Ch 10, sl st in the same st to form a loop. Fasten off.
Assembly
Joining round: Place the two panels together with wrong sides facing. Join Color B with sc through both layers, working along the left side, bottom, and right side, with 3 sc in each corner. Fasten off.
Edging
Edging round: Join Color B at the top edge of the front panel. Sc evenly around the entire top opening, working 1 sc in each st and 3 sc in each corner. Fasten off.
Assembly and Finishing
Weave in all ends on the wrong side of the sleeve, using the tapestry needle and taking care not to pull the striped fabric tight. Sew the vintage-style button to the front panel directly opposite the button loop, using sewing needle and thread and checking that the loop fits over the button comfortably. Lightly block the finished sleeve by misting it with water and patting it flat into shape; let it dry completely before sliding your phone inside.
Pro Tips and Variations
- Swap the stripes for a solid chocolate body with a caramel edging for a simpler, more modern look.
- Use a slightly larger button and a longer chain loop (ch 12-14) if you prefer a looser closure.
- Try a soft acrylic or cotton yarn in autumn shades — rust, cream, and deep brown — for a cozy seasonal version.