Desert Dawn Crochet Dishcloth Free Pattern
Introduction
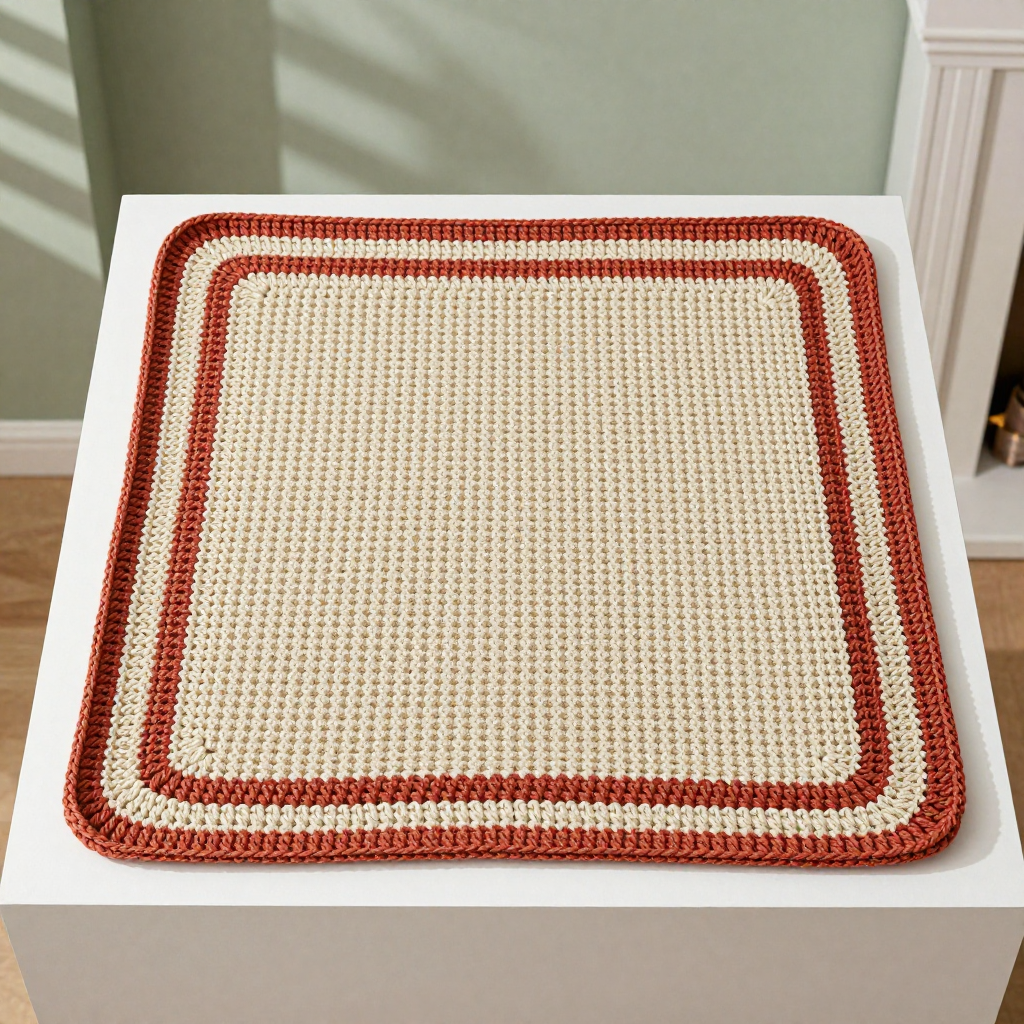
The Desert Dawn Crochet Dishcloth is a simple, satisfying project for anyone who has just learned single crochet and wants a finished piece they can actually use. The center is worked in undyed natural cotton, then framed with a four-round striped border in muted terracotta and sand for a warm, desert boho look. It works up flat and square, about 8 inches (20 cm) on each side, with a dense, even single-crochet texture that feels sturdy and absorbent in the hand. It makes a lovely first dishcloth, a quick gift, or a small way to bring a little handmade warmth into your kitchen.
Materials Needed
- Yarn: Worsted weight (4) 100% cotton yarn, approximately 120 yards total:
- Color A (natural undyed): 80 yards
- Color B (terracotta): 20 yards
- Color C (sand): 20 yards
- Hook: 5.0 mm (H-8) crochet hook
- Notions: Tapestry needle for weaving in ends, scissors, and a measuring tape
- Finished size: Approximately 8 inches (20 cm) square
Abbreviations
- ch — chain: yarn over and pull through the loop on your hook.
- sc — single crochet: insert hook into stitch, yarn over, pull up a loop, yarn over, pull through both loops.
- sl st — slip stitch: insert hook into stitch, yarn over, pull through both the stitch and the loop on your hook.
- st(s) — stitch(es)
- R — row
- Rnd — round
Gauge
14 stitches and 16 rows = 4 inches (10 cm) in single crochet. To check it, crochet a small swatch in single crochet and measure a 4-inch section in both directions; adjust your hook size if your stitches come out larger or smaller than this.
Tips Before You Start
- Cotton has little stretch, so keep your tension relaxed and even — this keeps the cloth flat and square rather than cupped.
- Count your stitches at the end of every row; the body stays at 28 stitches throughout, and a missed stitch will show at the edges.
- When working the border, place your stitches evenly along the row ends so the sides stay straight and the corners don't pull.
- Carry or fasten off colors neatly between border rounds — you'll weave these ends in later, so leave tails long enough to thread easily.
Step-by-Step Instructions
Main Body (Color A)
Setup: With Color A, ch 29.
R1: Sc in 2nd ch from hook and in each ch across (28 sc).
R2: Ch 1, turn, sc in each st across (28 sc).
R3–28: Repeat R2 (28 sc). Do not fasten off.
Border
Rnd 1 (Color A): Ch 1, turn, sc evenly around the entire piece, working 1 sc in each st along the top and bottom edges, 1 sc in each row end along the sides, and 3 sc in each corner; join with sl st to first sc. Fasten off Color A.
Rnd 2 (Color B): Join Color B in any corner sc, ch 1, sc in each sc around, working 3 sc in each corner; join with sl st to first sc. Fasten off Color B.
Rnd 3 (Color C): Join Color C in any corner sc, ch 1, sc in each sc around, working 3 sc in each corner; join with sl st to first sc. Fasten off Color C.
Rnd 4 (Color B): Join Color B in any corner sc, ch 1, sc in each sc around, working 3 sc in each corner; join with sl st to first sc. Fasten off.
Assembly and Finishing
There is no seaming — the cloth is worked in one piece. Weave in all yarn ends on the wrong side with your tapestry needle, running each tail through a few stitches in one direction and then back through a few in the other so it stays secure. Lightly block the cloth by misting it with water and pinning it to an 8-inch square on a towel or blocking mat; let it dry completely. This smooths the border rounds and helps the corners sit flat.
Pro Tips and Variations
- Swap the border colors for any muted palette you love — sage and cream, dusty rose and oatmeal, or charcoal and pale gray all work beautifully.
- Add a hanging loop by chaining 10–12 at one corner during the final border round and joining with a sl st before fastening off.
- Make a matching set in different color combinations and tie them with twine for a quick, practical gift.