Charcoal Herringbone Bucket Bag Free Crochet Pattern
Introduction
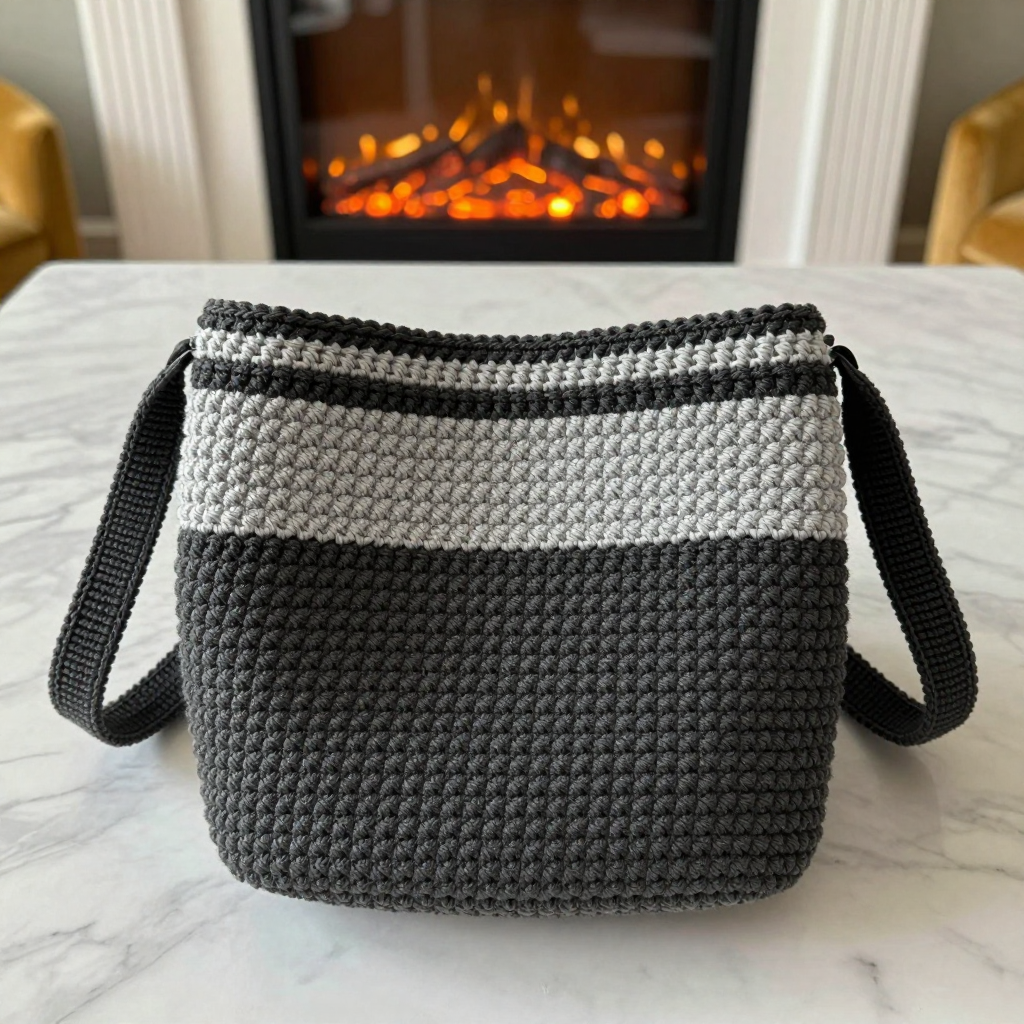
This charcoal herringbone bucket bag is a wonderful next-step project for anyone who has mastered single crochet and is ready to try a new texture. The herringbone half double crochet stitch gives the bag a dense, woven look that holds its shape beautifully, so it stands up on its own instead of slouching. A single ash-gray stripe near the top adds just enough contrast to make the deep charcoal body feel modern and polished. It is sturdy enough for everyday errands, roomy enough for the essentials, and simple enough that you will want to make one in every color.
Materials Needed
- Yarn: Worsted weight (4) yarn, approx 300 yds total — 250 yds charcoal (Color A) and 50 yds ash (Color B). Sample used Lion Brand Wool-Ease in Charcoal (A) and Ash (B).
- Hook: 5.5 mm (I-9) crochet hook
- Notions: Tapestry needle, stitch marker, scissors, measuring tape
- Finished size: Approx 10 inches wide x 10 inches tall x 4 inches deep, with 12-inch handles
Abbreviations
- ch — chain
- sc — single crochet
- hhdc — herringbone half double crochet (yarn over, insert hook in stitch, yarn over and pull through the stitch and the first loop on the hook, yarn over and pull through both remaining loops)
- sc2tog — single crochet two stitches together (a decrease)
- sl st — slip stitch
- st(s) — stitch(es)
- R — row or round
Gauge
14 stitches and 12 rows = 4 inches in herringbone half double crochet. Work a small swatch in hhdc and measure it flat before starting; if you have more stitches than 14 in 4 inches, go up a hook size, and if you have fewer, go down.
Tips Before You Start
- Herringbone half double crochet pulls slightly tighter than a regular hdc, so keep your tension relaxed or your bag will come out narrower than the finished size.
- Always join each round with a slip stitch to the first hhdc and begin the next round with a ch 1 — this keeps the seam straight and the stripe even.
- Count your 60 stitches at the end of the base round; if you land a stitch or two off, adjust evenly around the oval before starting the body.
- Carry Color B up the inside of the bag during the stripe so you do not have to weave in extra ends.
Step-by-Step Instructions
Base (Color A)
Row 1: Ch 21, sc in 2nd ch from hook and each ch across (20 sts).
Row 2: Ch 1, turn, 2 sc in first st, sc in each st across to last st, 2 sc in last st (22 sts).
Rows 3-10: Ch 1, turn, sc in each st across (22 sts).
Row 11: Ch 1, turn, sc2tog, sc in each st across to last 2 sts, sc2tog (20 sts). Do not fasten off.
Body (Color A, then B, then A)
Base round: Working along the edge of the base, 1 sc in each row end around the entire base, join with sl st to first sc (approx 60 sts).
Rnd 1: Ch 1, hhdc in each st around, join with sl st to first hhdc (60 sts).
Rnds 2-20: Ch 1, hhdc in each st around, join with sl st to first hhdc (60 sts).
Change to Color B.
Rnds 21-24: Ch 1, hhdc in each st around, join with sl st to first hhdc (60 sts).
Change to Color A.
Rnds 25-28: Ch 1, hhdc in each st around, join with sl st to first hhdc (60 sts). Fasten off.
Handles (make 2, Color A)
Row 1: Ch 31, sc in 2nd ch from hook and each ch across (30 sts).
Row 2: Ch 1, turn, sc in each st across (30 sts). Fasten off, leaving a long tail for sewing.
Edging (Color B)
Rnd 1: Join B at top edge, ch 1, sc in each st around, join with sl st to first sc (60 sts). Fasten off and weave in ends.
Assembly and Finishing
Fold each handle in half lengthwise to form a strap. Pin the ends of one handle to the bag on one side, about 3 inches apart and 1 inch below the top edge, then sew securely with the long tail using a whipstitch. Repeat with the second handle on the opposite side, checking that both sit level. Weave in all remaining ends on the inside of the bag. Block lightly by misting with water and shaping the bag over a small box or bowl, then let it dry completely so the base sits flat and the herringbone texture opens up evenly.
Pro Tips and Variations
- Add a second ash stripe lower on the body, or swap the stripe color for a deep mustard or rust for a bolder look.
- Work a few extra rounds of hhdc to make a taller tote, remembering to add roughly 25 yds of Color A per extra round.
- For a stiffer bag, work the base with a hook one size smaller, or add a fabric lining sewn in by hand before attaching the handles.