Caramel Twist Donut Gnome Knit Free Pattern
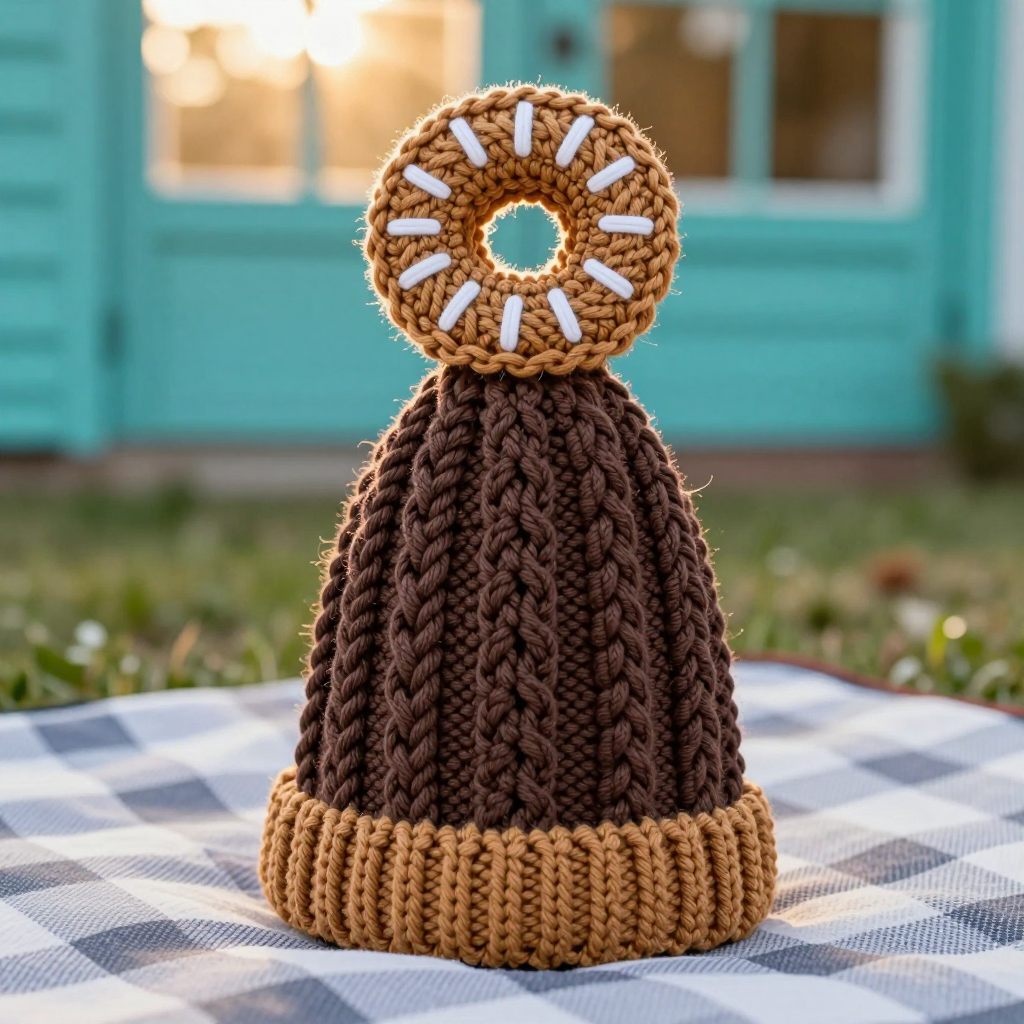
Caramel Twist Donut Gnome Knit Free Pattern
Introduction
Meet the Caramel Twist Donut Gnome, a cozy little cone-shaped character in rich chocolate cotton with a wide caramel cable-twist brim and a tiny donut perched on top like a hat. This pattern is written for intermediate knitters who are comfortable working in the round and crossing a few cables, and it comes together quickly in DK cotton. The finished gnome is about 8 inches tall, firm and squishy in the body, with a textured brim that fans out into a 4-inch skirt and a sweet little ring topper. It is a lovely fairycore touch for pumpkin season shelves, gift swaps, or anyone who loves a whimsical handmade doll.
Materials Needed
- Yarn: DK weight, 100% cotton, 50g/120yds (110m) per ball.
- Chocolate (MC): 1 ball (approx 80yds used)
- Caramel (CC): 1 ball (approx 60yds used)
- White: small amount for optional donut icing
- Needles: 3.75mm (US 5) knitting needles (circular or double-pointed for working in the round)
- Notions: cable needle, stitch markers, tapestry needle, toy stuffing
- Finished size: approx 8 inches (20cm) tall from base to top of hat, with a 4-inch (10cm) diameter brim
Abbreviations
- CO – cast on
- k – knit
- p – purl
- k2tog – knit two stitches together (one decrease)
- sts – stitches
- R / Rnd – round
- rem – remaining
- BO – bind off
- C4F – cable 4 front: slip 2 sts to cable needle and hold in front, k2, then k2 from cable needle
Gauge
24 sts and 32 rows = 4 inches (10cm) in stockinette stitch. Knit a small swatch in the round and measure a 4-inch section; adjust needle size if your stitch count is off so the gnome finishes at the right height.
Tips Before You Start
- Work all pieces in the round on circular or double-pointed needles; use a stitch marker at the start of each round.
- The cable rounds in the brim are worked on a p2, [k2, p2] background — keep the purl columns untwisted so the cable pops.
- Stuff the body firmly but in small handfuls so the cone keeps its shape without lumps.
- Leave long tails on the brim and donut for sewing, and pin the brim in place before seaming so the 1-inch overlap sits evenly.
Step-by-Step Instructions
Body (MC)
CO 48 sts and join in the round, being careful not to twist.
R1-6: k2, p2 rib (48 sts)
R7-30: k all sts (48 sts)
R31: [k6, k2tog] x6 (42 sts)
R32: k (42 sts)
R33: [k5, k2tog] x6 (36 sts)
R34: k (36 sts)
R35: [k4, k2tog] x6 (30 sts)
R36: k (30 sts)
R37: [k3, k2tog] x6 (24 sts)
R38: k (24 sts)
R39: [k2, k2tog] x6 (18 sts)
R40: k (18 sts)
R41: [k1, k2tog] x6 (12 sts)
R42: k2tog x6 (6 sts)
Break yarn, thread through rem sts, and pull tight. Stuff the body firmly.
Brim (CC)
CO 60 sts and join in the round.
R1-4: k2, p2 rib (60 sts)
R5-6: p2, [k2, p2] to end (60 sts)
R7: p2, [C4F, p2] to end (60 sts)
R8-10: p2, [k2, p2] to end (60 sts)
R11: p2, [C4F, p2] to end (60 sts)
R12-14: p2, [k2, p2] to end (60 sts)
R15: p2, [C4F, p2] to end (60 sts)
R16-18: p2, [k2, p2] to end (60 sts)
R19: p2, [C4F, p2] to end (60 sts)
R20-22: p2, [k2, p2] to end (60 sts)
R23: p2, [C4F, p2] to end (60 sts)
R24-26: p2, [k2, p2] to end (60 sts)
BO all sts in pattern. Sew the brim to the body at the base, overlapping the body base by 1 inch.
Donut Nose-Hat (CC)
CO 30 sts and join in the round.
R1-6: k all sts (30 sts)
R7: [k3, k2tog] x6 (24 sts)
R8: k (24 sts)
R9: [k2, k2tog] x6 (18 sts)
R10: k (18 sts)
R11: [k1, k2tog] x6 (12 sts)
R12: k2tog x6 (6 sts)
Break yarn, thread through rem sts, and pull tight. Stuff lightly. Sew to the top of the body, centering over the point.
Donut Icing (white, optional)
With white yarn, embroider small French knots or short straight stitches over the donut to simulate icing.
Assembly and Finishing
Sew the brim to the body base with a tapestry needle, overlapping the body base by 1 inch and pinning in place first so the cable columns sit straight. Sew the donut to the top of the body, centered over the point. Weave in all ends, using the long tails to close any small gaps at the seams. Block lightly by misting with water and shaping the brim flat; let dry fully before displaying.
Pro Tips and Variations
- Swap the caramel for a pumpkin orange for a stronger pumpkin-season look, or use a variegated CC so each cable twist reads differently.
- Add a second cable round between the existing ones for a denser twist texture, or leave the brim plain ribbed for a simpler beginner version.
- Make a mini version by casting on 36 sts for the body and 48 for the brim, keeping the same decrease ratios and gauge.