Baby Blue Waffle Candle Cozy Free Crochet Pattern
Introduction
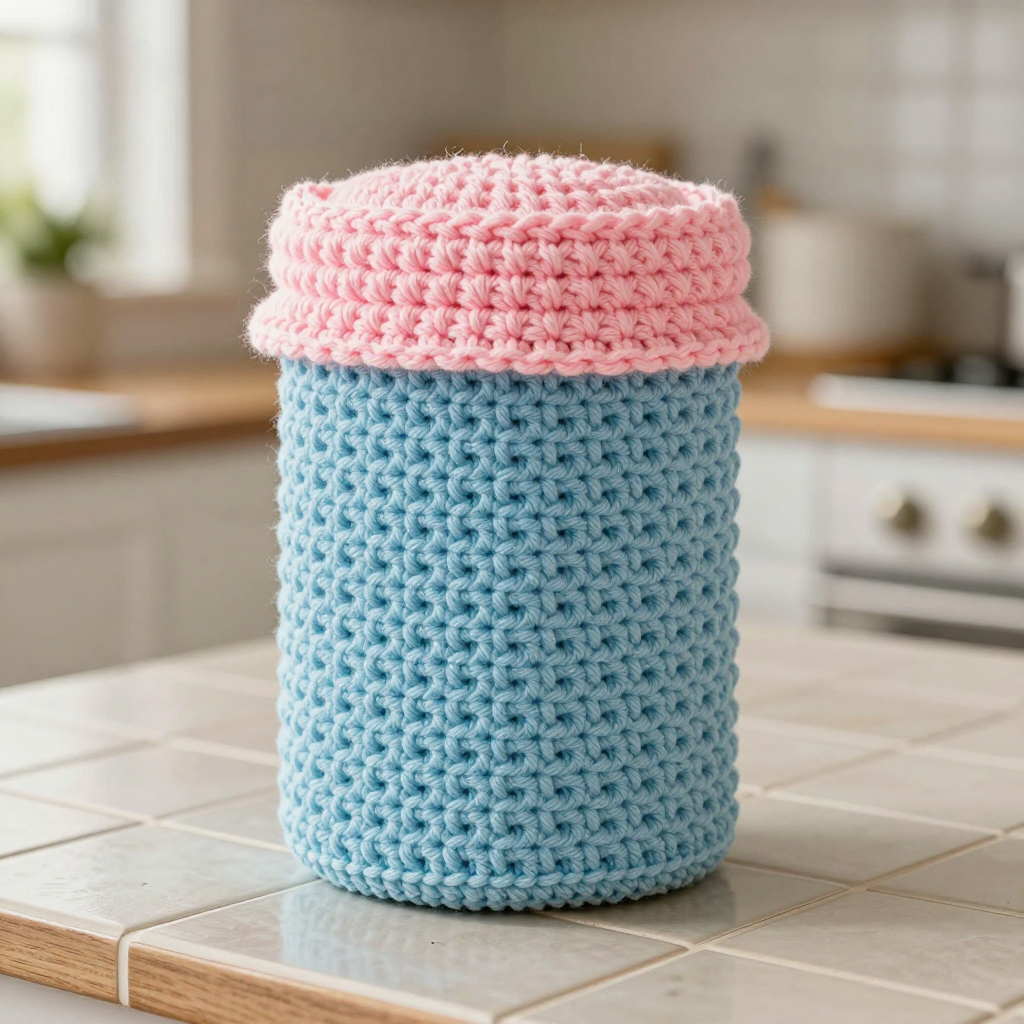
This little candle cozy is the perfect quick win for anyone who has mastered the basics and wants to try a textured stitch without committing to a big project. Worked as one simple straight tube in the round, it slips over a standard 3-inch jar and dresses it up in soft baby blue waffle stitch with a turned-down pink brim. The raised waffle grid gives the fabric a squishy, quilted look and feel, while the plain pink cuff adds a cozy cabin touch that looks lovely on a shelf or windowsill. It's a sweet handmade gift, a stash-buster, and a great way to practice front-post double crochet.
Materials Needed
- Yarn: Aran weight (Category 4) wool blend. Color A (Baby Blue): approx 90 yd (82 m). Color B (Cotton Candy Pink): approx 25 yd (23 m).
- Hook: 5.0 mm (US H-8), or size needed to match gauge.
- Notions: Stitch marker, tapestry needle, scissors, tape measure.
- Finished size: Approx 3.5 in (9 cm) diameter x 4.5 in (11.5 cm) tall; fits a 3 in (7.6 cm) diameter jar. The cuff folds down approx 1.25 in (3 cm).
Abbreviations
- ch – chain
- sl st – slip stitch
- sc – single crochet
- dc – double crochet
- fpdc – front-post double crochet (work a double crochet around the post of the stitch below, from front to back, instead of into the top of the stitch)
- st(s) – stitch(es)
- rnd – round
- rep – repeat
Gauge
14 sts x 8 rows = 4 in (10 cm) in waffle stitch (dc, fpdc pattern). To check, work a small swatch in the waffle pattern and measure a 4-inch section across the middle; adjust your hook size if needed.
Tips Before You Start
- Don't twist the ring. When you join the starting chain into a circle, check that all the chains lie flat and untwisted before working Round 1 — a twist here can't be fixed later.
- Keep the fpdc loose. Front-post stitches can pull the fabric tight; ease each fpdc slightly so the waffle grid stays even and the cozy still slides over the jar.
- Use a stitch marker. Place a marker in the first stitch of each round so you always know where to join and where the round begins.
- Check the fit early. After a few rounds, slip the tube over your jar to confirm it fits comfortably before you finish the body.
Step-by-Step Instructions
Notes: Worked in the round, joined each rnd; ch 3 counts as the first dc. Waffle pattern = alternating dc and fpdc in 3-st groups, offset every other rnd.
Tube (Color A – Baby Blue)
Setup: Ch 40, join with sl st to first ch, being careful not to twist (40 sts).
Rnd 1: Ch 3, dc in each ch around, join (40 sts).
Rnd 2: Ch 3, [dc in next 2 sts, fpdc around next st] rep around, join (40 sts).
Rnd 3: Ch 3, [fpdc around next 2 sts, dc in next st] rep around, join (40 sts).
Rnds 4–16: Rep Rnds 2–3, ending on a Rnd 2-type round (40 sts). Fasten off A.
Cuff (Color B – Cotton Candy Pink)
Setup: Join B with sl st to any st of the last rnd.
Rnd 17: Ch 3, dc in each st around, join (40 sts).
Rnds 18–20: Ch 3, dc in each st around, join (40 sts).
Rnd 21: Ch 1, sc in each st around, join (40 sts). Fasten off B.
Assembly and Finishing
Weave in all ends on the inside of the tube. Turn the tube inside out, then fold the pink cuff (Color B) down over the outside of the blue body approx 1.25 in (3 cm) to form the turned-down brim. Block lightly — mist with water and shape gently — to set the waffle texture, then let dry completely. Slip the cozy over your jar and enjoy.
Pro Tips and Variations
- Color swap: Try a cream body with a sage or mustard cuff for a different seasonal look.
- Add a hanging loop: Before fastening off the cuff, ch 10 and sl st back to the same st to create a small loop for hanging.
- Adjust the height: Add or remove waffle rounds in pairs (Rnds 2–3) to fit taller or shorter jars, keeping the cuff rounds the same.