Striped Cottage Ruana: Free Crochet Pattern
Striped Cottage Ruana: Free Crochet Pattern
Introduction
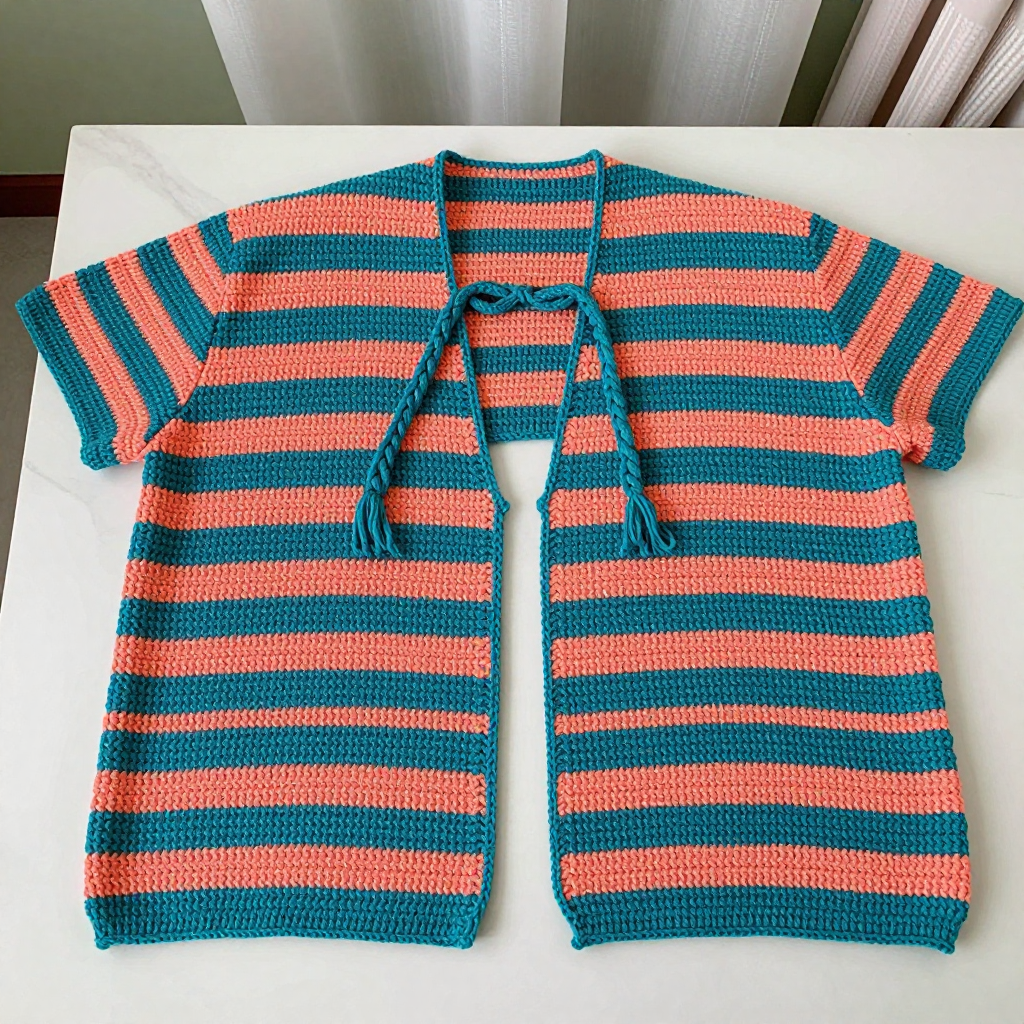
The Striped Cottage Ruana is a cozy, drapey wrap that's perfect for beginners who want to make something they'll actually wear all season. It's crocheted from two simple rectangular panels worked side-to-side in half double crochet, so you only ever need to know one stitch. Alternating four-row stripes of teal and coral give it a soft, cottagecore look, and the two panels join along one long edge with a centered neck opening. The bulky yarn makes it work up quickly, and the fabric feels warm, squishy, and light enough to throw over a dress or a tee. Braided teal ties at the neck edges finish it off with a sweet handmade detail.
Materials Needed
- Yarn: Bulky (weight 5) acrylic or cotton blend. Color A (teal): 800 yards. Color B (coral): 800 yards.
- Hook: 8 mm (US L/11), or the size needed to match gauge.
- Notions: Tapestry needle for seaming and weaving in ends, scissors, a measuring tape, and a stitch marker (optional, for marking the neck opening).
- Finished size: One size fits most adults: 40 inches long x 30 inches wide before seaming (each panel is about 30 x 30 inches).
Abbreviations
- ch — chain: make a loop of yarn and pull it through the loop on your hook.
- hdc — half double crochet: yarn over, insert hook into the stitch, yarn over, pull up a loop, yarn over, pull through all three loops on the hook.
- st(s) — stitch(es).
- sl st — slip stitch: insert hook into the stitch, yarn over, pull through both the stitch and the loop on your hook.
- sc — single crochet: insert hook into the stitch, yarn over, pull up a loop, yarn over, pull through both loops on the hook.
- A — teal; B — coral.
Gauge
12 stitches and 8 rows = 4 inches in half double crochet. To check, crochet a small swatch in hdc, measure a 4-inch section in the middle, and adjust your hook size if you have more or fewer stitches than 12 per 4 inches.
Tips Before You Start
- Change colors at the end of the last row of a stripe by pulling the new color through the final loop of the last stitch, so the color change sits neatly at the edge.
- Keep your turning chains loose. A tight ch 2 makes the panel edges pull in and makes seaming harder.
- Count your stitches at the end of every stripe. Each row should stay at 89 hdc; a dropped stitch will show up as a wavy panel later.
- Work both panels with the same hook and tension so they match in size before you seam them together.
Step-by-Step Instructions
Panel (make 2)
Row 1: With A, ch 91. Hdc in the 3rd ch from hook and in each ch across (89 hdc).
Rows 2-4: Ch 2, turn, hdc in each st across (89 hdc).
Change to B.
Rows 5-8: Ch 2, turn, hdc in each st across (89 hdc).
Change to A.
Rows 9-12: Ch 2, turn, hdc in each st across (89 hdc).
Change to B.
Rows 13-16: Ch 2, turn, hdc in each st across (89 hdc).
Change to A.
Rows 17-20: Ch 2, turn, hdc in each st across (89 hdc).
Change to B.
Rows 21-24: Ch 2, turn, hdc in each st across (89 hdc).
Change to A.
Rows 25-28: Ch 2, turn, hdc in each st across (89 hdc).
Change to B.
Rows 29-32: Ch 2, turn, hdc in each st across (89 hdc).
Change to A.
Rows 33-36: Ch 2, turn, hdc in each st across (89 hdc).
Change to B.
Rows 37-40: Ch 2, turn, hdc in each st across (89 hdc).
Change to A.
Rows 41-44: Ch 2, turn, hdc in each st across (89 hdc).
Change to B.
Rows 45-48: Ch 2, turn, hdc in each st across (89 hdc).
Change to A.
Rows 49-52: Ch 2, turn, hdc in each st across (89 hdc).
Change to B.
Rows 53-56: Ch 2, turn, hdc in each st across (89 hdc).
Change to A.
Rows 57-60: Ch 2, turn, hdc in each st across (89 hdc).
Fasten off. The panel should measure about 30 inches in the stripe direction. Make a second panel identical.
Assembly
Place the two panels side by side with their long edges touching, leaving a 10-inch opening centered for the neck. Whipstitch or single crochet seam the panels together along the long edges, working from the outer edges toward the center, leaving the center 10 inches unseamed.
Ties
With A, cut 6 strands of yarn, each 40 inches long. Divide into 2 groups of 3 strands. Braid each group to make two 18-inch braids. Fold each braid in half and attach it to the front neck edges at the beginning of the opening using a lark's head knot. Trim the ends evenly.
Assembly and Finishing
Seam the two panels as described above, checking that the 10-inch neck opening is centered before you finish the seam. Weave in all ends on the wrong side of the fabric, working them through several stitches so they don't work loose. Block the finished ruana lightly by misting it with water and pinning it to the finished measurements (40 inches long x 30 inches wide), then let it dry fully before wearing.
Pro Tips and Variations
- Make wider stripes (6 or 8 rows) for a bolder look, or use three colors in rotation for a scrappier cottage feel.
- Add a simple single crochet border around the entire outer edge for a tidy finish and a little extra structure.
- Swap the braided ties for a long crocheted chain or a purchased leather cord if you prefer a different closure at the neck.