Ribbed Ear-Warmer Headband Hat: Free Crochet Pattern for Small Dogs
Introduction
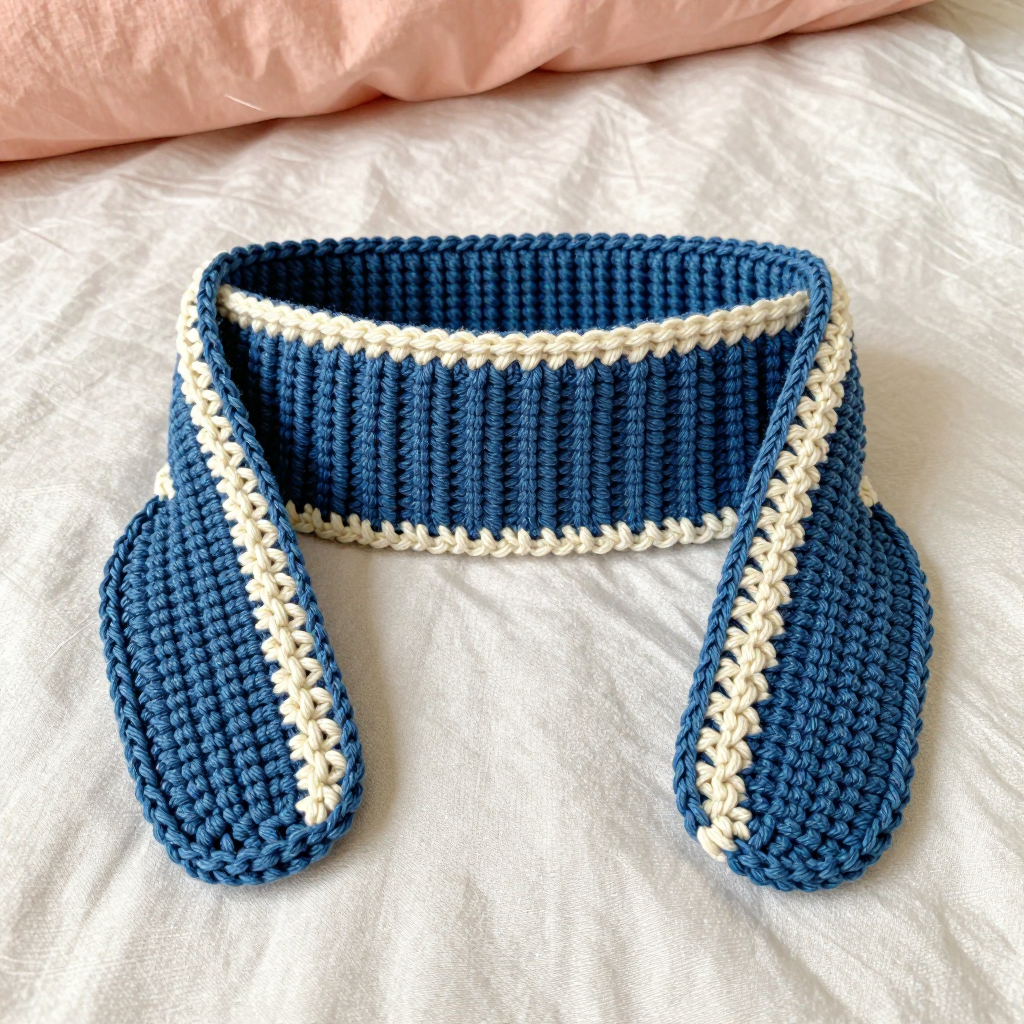
This cozy ribbed ear-warmer headband is a quick, satisfying project made for small dogs who need a little extra warmth without a full hat. Worked sideways in bulky wool, the band stretches to fit snugly, while two simple ear flaps and a cream mosaic cross border give it a clean Scandinavian look that's perfect for Halloween photos or chilly autumn walks. The horizontal ribbing makes it soft and flexible, and the two-color border adds just enough detail to feel special without being fussy. If you can single crochet, you can make this—most of the hat is one repeated row.
Materials Needed
- Yarn: Bulky (weight category 5), 100% wool, approx. 80 yards total: 50 yards denim blue (Color A), 30 yards cream (Color B).
- Hook: 6.0 mm (US J/10).
- Notions: Tapestry needle for seaming and weaving in ends, scissors, tape measure, stitch markers (optional).
- Finished size: Band circumference approx. 12 inches (30.5 cm), height 3 inches (7.6 cm); ear flaps 2 inches (5 cm) wide x 2.5 inches (6.4 cm) long.
Abbreviations
- ch – chain: make a loop of yarn and pull it through the loop on your hook.
- sc – single crochet: insert hook, yarn over, pull up a loop, yarn over, pull through both loops.
- st(s) – stitch(es).
- sp – space (here, the gap made by a ch-2).
- blo – back loop only: work into the loop of the stitch farthest from you, leaving the front loop free to create ribbing.
- RS / WS – right side / wrong side (the outside / inside of the fabric).
- rep – repeat.
Gauge
12 sts x 12 rows = 4 inches (10 cm) in the ribbed pattern (sc in back loop only). To check, crochet a small swatch in blo and measure a 4-inch section; adjust your hook size if you have too many or too few stitches.
Tips Before You Start
- Always work the band and flaps into the back loop only after Row 1—this is what creates the stretchy horizontal ribbing.
- Measure your dog's head circumference and work the band to that length minus 1 inch for negative ease, so the headband stays on.
- Keep your tension even and slightly loose; bulky wool worked tightly will make the band stiff and hard to stretch over the ears.
- Count your row-end stitches as you go along the long edges—about 36 sc per edge keeps the mosaic border balanced on both sides.
Step-by-Step Instructions
Band (worked sideways in ribbing)
Row 1: With A, ch 10, sc in 2nd ch from hook and each ch across (9 sts).
Row 2: Ch 1, turn, sc in blo of each st across (9 sts).
Rows 3–36: Rep Row 2 until piece measures 12 inches (30.5 cm) from start, ending after a WS row (9 sts). Do not fasten off.
Ear Flaps (make 2)
Row 1: With A, ch 7, sc in 2nd ch from hook and each ch across (6 sts).
Row 2: Ch 1, turn, sc in blo of each st across (6 sts).
Rows 3–8: Rep Row 2 until flap measures 2.5 inches (6.4 cm) (6 sts). Fasten off, leaving a long tail for sewing.
Mosaic Border (worked along one long edge of band)
With RS facing and B, join yarn at one corner of the band.
Row 1 (RS): Ch 1, sc evenly along edge, working 1 sc in each row-end st (approx. 36 sts).
Row 2 (WS): Ch 1, turn, sc in each st across (36 sts).
Row 3 (RS): Ch 1, turn, sc in first 2 sts, *ch 2, skip 2 sts, sc in next 2 sts; rep from * across, ending with sc in last 2 sts (36 sts, with ch-2 spaces between).
Row 4 (WS): Ch 1, turn, sc in each st and in each ch-2 sp across (36 sts).
Row 5 (RS): Ch 1, turn, sc in each st across (36 sts). Fasten off.
Rep the mosaic border along the other long edge of the band.
Assembly and Finishing
Fold the band in half widthwise to form a loop with RS together. Sew the short ends together using mattress stitch to form a tube, then turn RS out. Sew the ear flaps to the bottom edge of the band, positioning them approx. 2 inches (5 cm) apart at the front, with the flaps pointing down. Weave in all ends. Lightly steam-block the band and borders to even out the stitches and relax the ribbing—do not press flat, or you'll lose the texture.
Pro Tips and Variations
- Swap cream for orange to make a pumpkin-inspired Halloween version, or use black and cream for a classic look.
- Add a second mosaic row of ch-2 spaces for a bolder cross pattern—just keep the stitch count even.
- For a warmer fit, line the inside of the band with a strip of soft fleece, hand-sewn in place.


