Corner Colorblock Herringbone Knit Backpack Free Pattern
Introduction
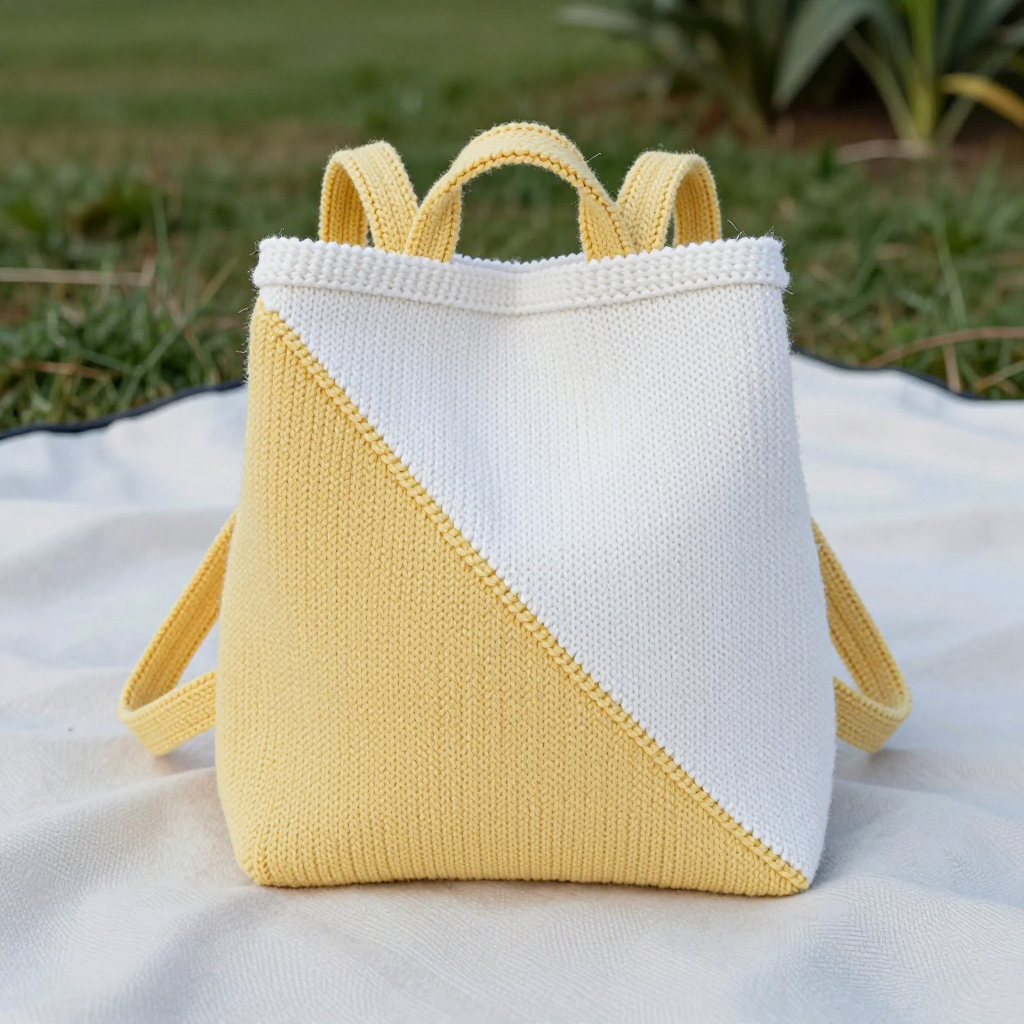
This little backpack is proof that one square of knitting can do a lot of work. It's a beginner-friendly project: you knit a single flat panel in a simple two-row herringbone texture, fold it on the diagonal, and seam a few edges to turn it into a triangular-front bag with a diagonal butter-yellow and white colorblock split. The recycled cotton gives it a soft, sturdy, slightly rustic hand that holds its shape without any stiffening, and the short knitted straps at the top corners keep the whole thing charmingly retro. It's perfect for anyone who has knit a scarf or two and wants a first bag, and it looks just as good hanging on a hook as it does on your back.
Materials Needed
- Yarn: Worsted weight (category 4) recycled cotton, approx. 200 yd (183 m) per 100 g skein.
- Color A (butter yellow): 1 skein (200 yd / 183 m)
- Color B (white): 1 skein (200 yd / 183 m)
- Needle: US 7 (4.5 mm) circular needle, 24" (60 cm) or longer, used to work flat.
- Notions: Tapestry needle for seaming and weaving in ends, stitch markers (optional), tape measure, scissors, blocking mats and pins.
- Finished size: Approx. 12" (30.5 cm) wide x 12" (30.5 cm) tall x 4" (10 cm) deep at the base, with a triangular front flap.
Abbreviations
- CO – cast on: make the starting loops on your needle.
- st(s) – stitch(es).
- k – knit stitch.
- p – purl stitch.
- k2tog – knit two stitches together: insert the needle through two stitches at once and knit them as one, decreasing by one stitch.
- yo – yarn over: wrap the yarn over the right needle to create a new stitch and a small eyelet.
- RS – right side: the outside face of the fabric.
- WS – wrong side: the inside face of the fabric.
- patt – pattern: keep working the established stitch pattern.
- BO – bind off: finish the edge so the stitches don't unravel.
Gauge
16 sts and 24 rows = 4" (10 cm) in herringbone stitch pattern, blocked. Knit a small swatch in pattern, block it, and measure a 4" section in the middle; if you have more stitches than 16, go up a needle size, and if you have fewer, go down.
Tips Before You Start
- Count your stitches often. The yarn over in Row 1 is balanced by the k2tog, so every row should stay at 48 sts. If you drift, the eyelets will pull the panel out of square.
- Keep the yarn overs loose. Cotton has little stretch, so a tight yo makes the herringbone texture pucker. Slide the yo up the needle before knitting the next stitch.
- Change colors on a WS row. Finish the yellow section after a WS row, then begin the white section with Row 1 (RS). This keeps the color change crisp and hidden inside the fold.
- Block before you seam. The panel must measure a true 12" x 12" (30.5 x 30.5 cm) square, or the diagonal fold won't line up with the colorblock split.
Step-by-Step Instructions
Panel (make 1, worked flat)
Row 1 (RS): K1, *k2tog, k1, yo, k1; rep from * to last st, k1 (48 sts).
Row 2 (WS): Purl (48 sts).
Rows 3–36: Repeat Rows 1–2 seventeen times (48 sts). Piece measures approx. 6" (15 cm) from CO, ending after a WS row.
Change to Color B.
Rows 37–72: Continue in herringbone patt (Rows 1–2) eighteen times, ending after a WS row (48 sts). Piece measures approx. 12" (30.5 cm) from CO.
Next row: BO all sts.
Straps (make 2)
With Color A, CO 8 sts.
Row 1 (RS): K1, *k2tog, k1, yo, k1; rep from * to last st, k1 (8 sts).
Row 2 (WS): Purl (8 sts).
Rows 3–36: Repeat Rows 1–2 seventeen times (8 sts). Strap measures approx. 6" (15 cm).
Next row: BO all sts. Leave a long tail (about 12" / 30 cm) on each strap for attaching.
Assembly and Finishing
Block: Wet-block or steam-block the panel to exactly 12" x 12" (30.5 x 30.5 cm), pinning the corners square, and block each strap to 6" (15 cm) long. Let everything dry completely.
Fold: Fold the panel in half diagonally so the two opposite corners meet and the yellow/white colorblock split runs along the diagonal fold. The folded shape is a triangle with the fold at the front.
Seam the sides: Using Color A and the tapestry needle, seam the two side edges from the fold down to the bottom corners, leaving the top 4" (10 cm) of each side edge open for the flap. Use a simple whipstitch or mattress stitch, working on the WS.
Seam the bottom: Seam the bottom edge closed the same way.
Attach the straps: With Color A, sew one strap end to the top corner of the back panel, 2" (5 cm) in from the side edge, and the other end of the same strap 2" (5 cm) in from the opposite side edge, so the strap forms a loop. Repeat with the second strap on the other top corner. Reinforce each join with a few extra stitches.
Weave in ends on the WS, then give the finished bag a light steam to settle the seams.
Pro Tips and Variations
- Swap the palette: Try sage green and cream, or navy and pale pink, for a different retro look while keeping the diagonal split.
- Make the straps longer: Work the straps to 10" (25 cm) instead of 6" (15 cm) for a shoulder bag, or add a third strap across the back for extra support.
- Add a lining: Cut a simple cotton lining to the triangle shape and hand-sew it inside before seaming the bottom for a sturdier, snag-free bag.